Stocking Stuffers for Circus Enthusiasts

Do you have someone in your life that does circus? Does their hobby brink on obsession? If you do, then this article will help you with your holiday shopping. The article is separated into types of circus folks to help guide the buying, but honestly many aerialists fall into multiple (or all) categories. Links have been included, but Born to Fly is receiving no proceeds for including them from the vendors of the items. Many were picked intentionally, but many are just quick looks via Amazon.  We’re just trying to make your holiday shopping SIMPLE as PIE! Enjoy!


The Aerial Addict

Let us begin with a more general group and move into some more specific types of practitioners. The Aerial Addict can be new to the circus, or a long-time enthusiast, but they have a burning passion for aerial and all things circus. When regular muggle things are turned into circus things, their heart soar and squeals may occur. Below is a fun list of things that you can give to help this soul rep their circus love loud and proud:
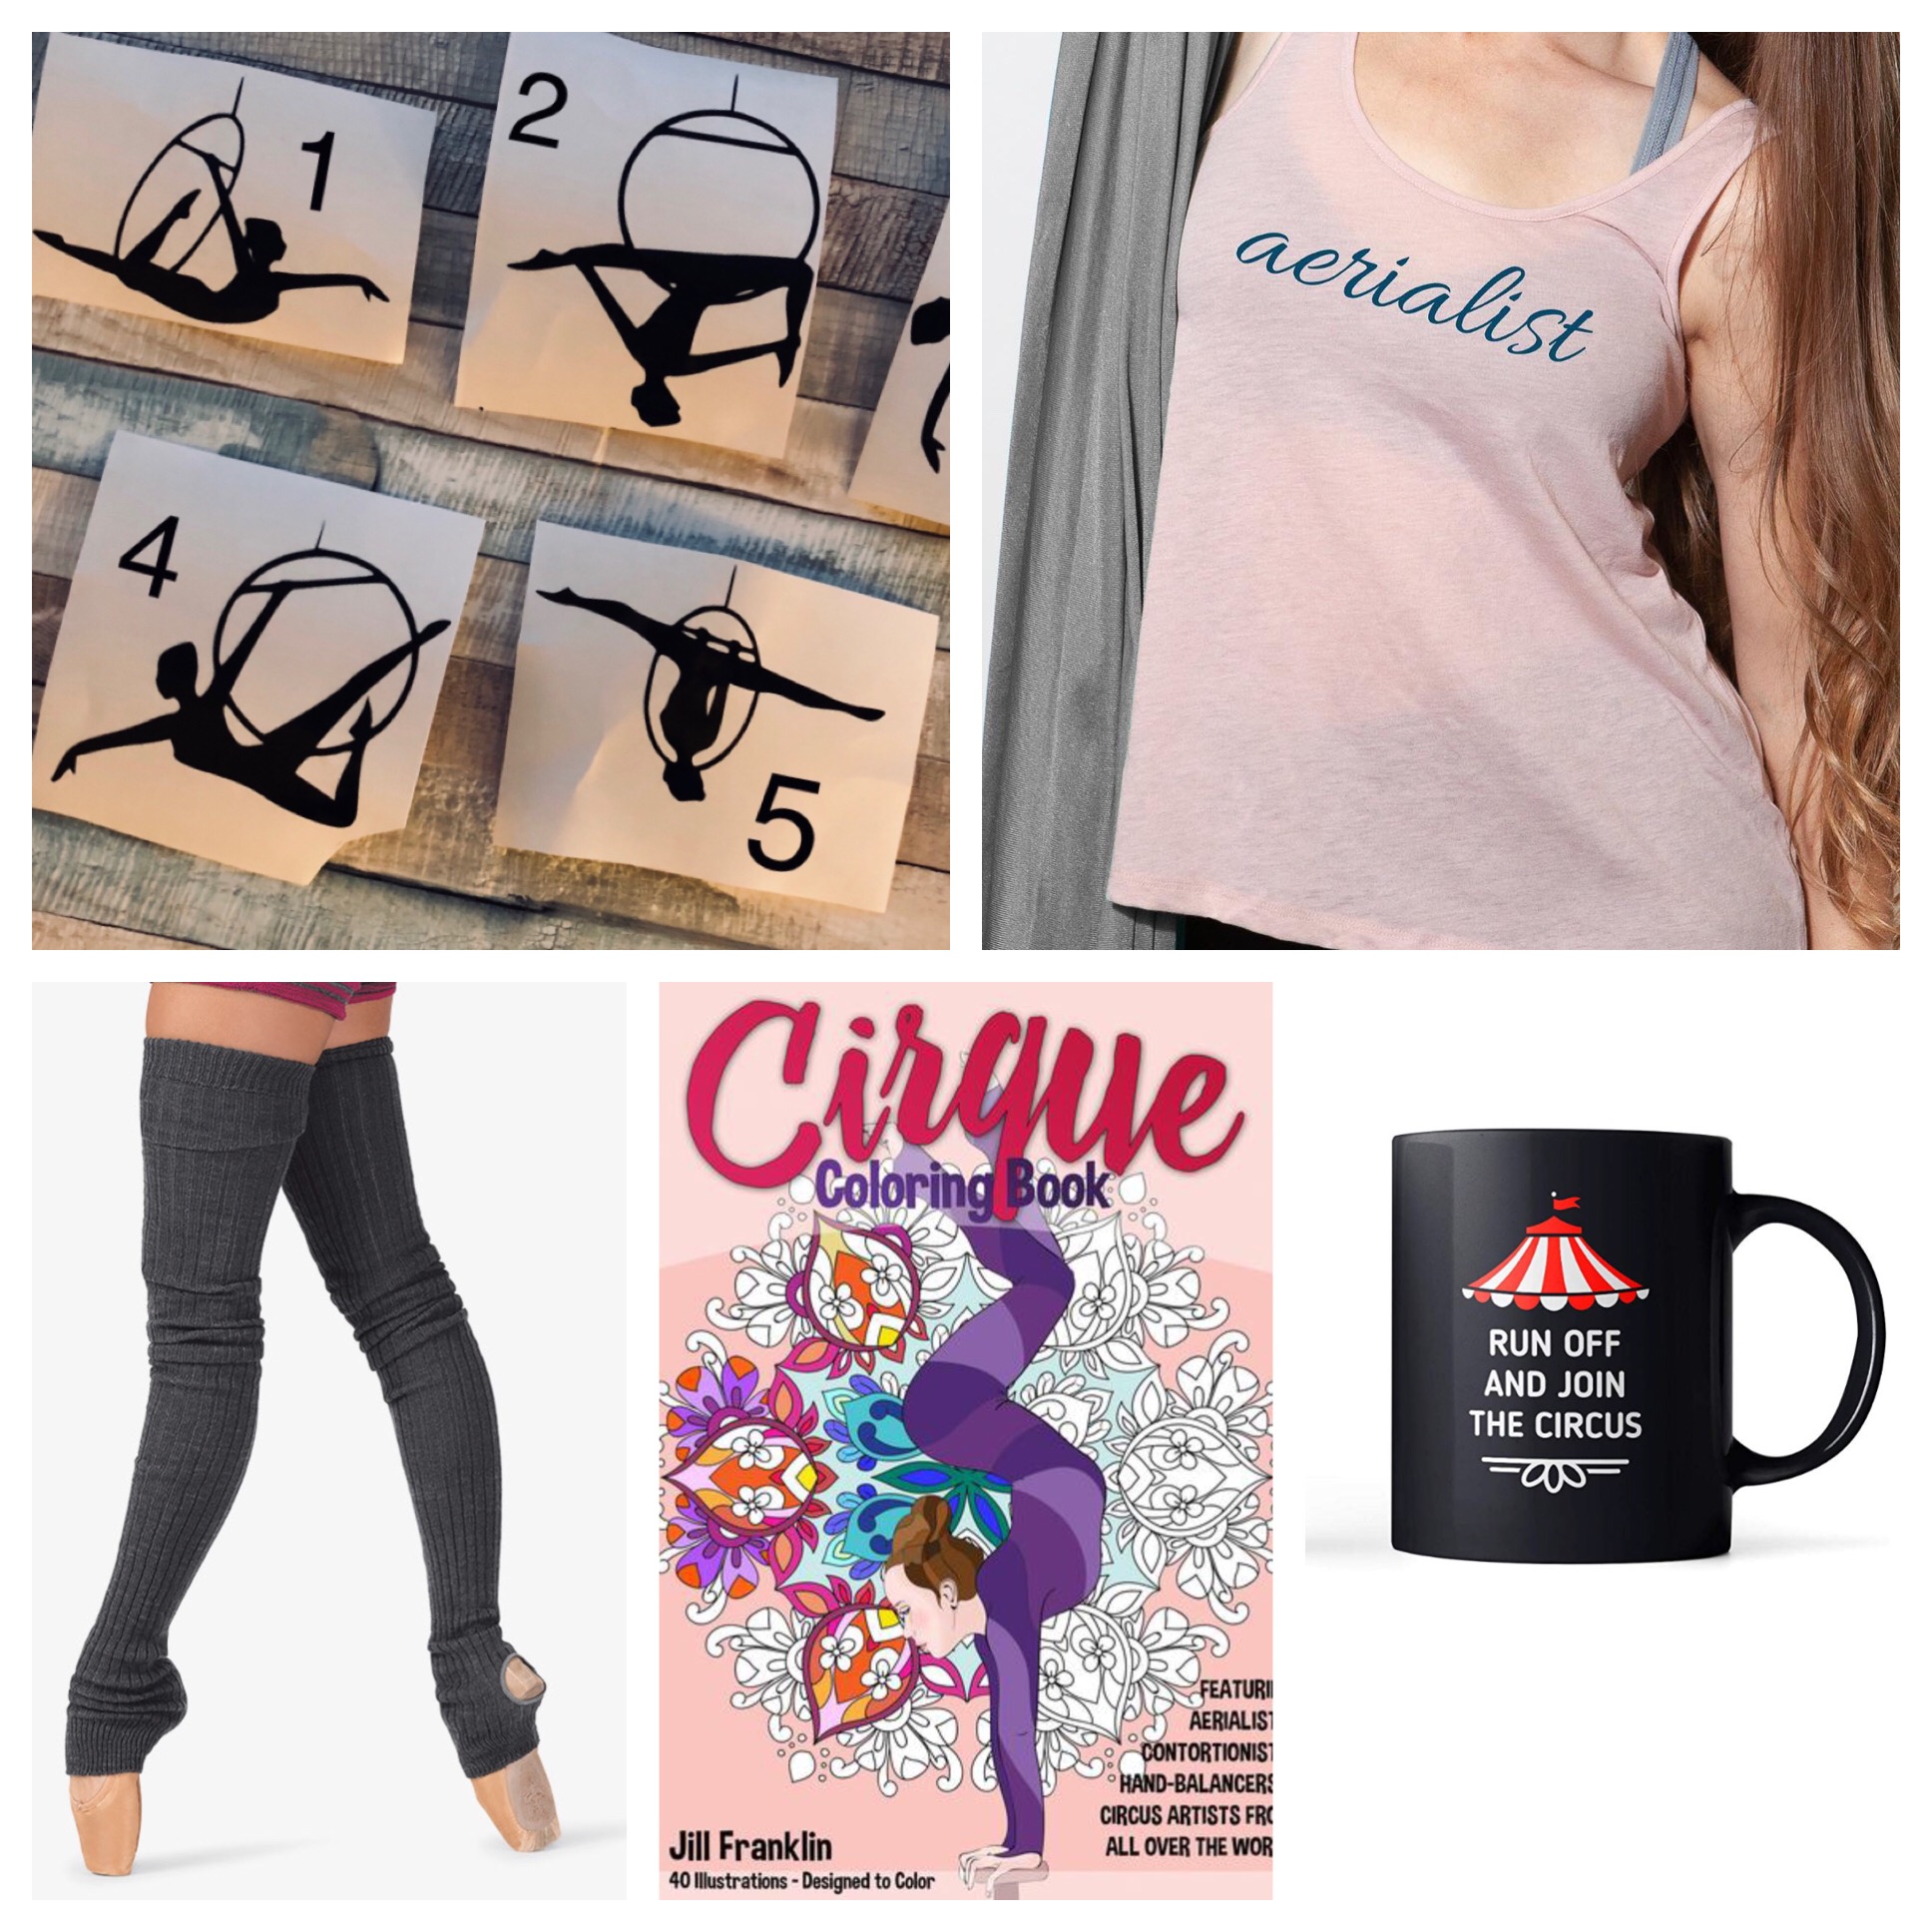
AerialAddict

Circus tanks
Leggings/leg warmers
Socks
Stickers/Decals
Water bottle/coffee mugs
iTunes/music gift card
Training notebook
Circus coloring books

These gifts are a great way to infuse circus into the everyday aspects of life. I know when I see these little things around I have found my people. These items are available in the rabbit hole that is Etsy but also fun things to creatively customize on your own for a more personal gift.


The Aches and Pains Athlete

This is our hardcore aerial addict! They are always striving to accomplish difficult things and working hard, resulting in all the muscle soreness that can be achieved by an individual. Along with aches, other pains often manifest from apparatuses “kisses” in the form of bruises, burns, or partial calluses. This person is dedicated to their work, but less so in their rest. The best gifts for this type of aerialist provide ouch assistance by helping them recover from their constant training. Consider the following:
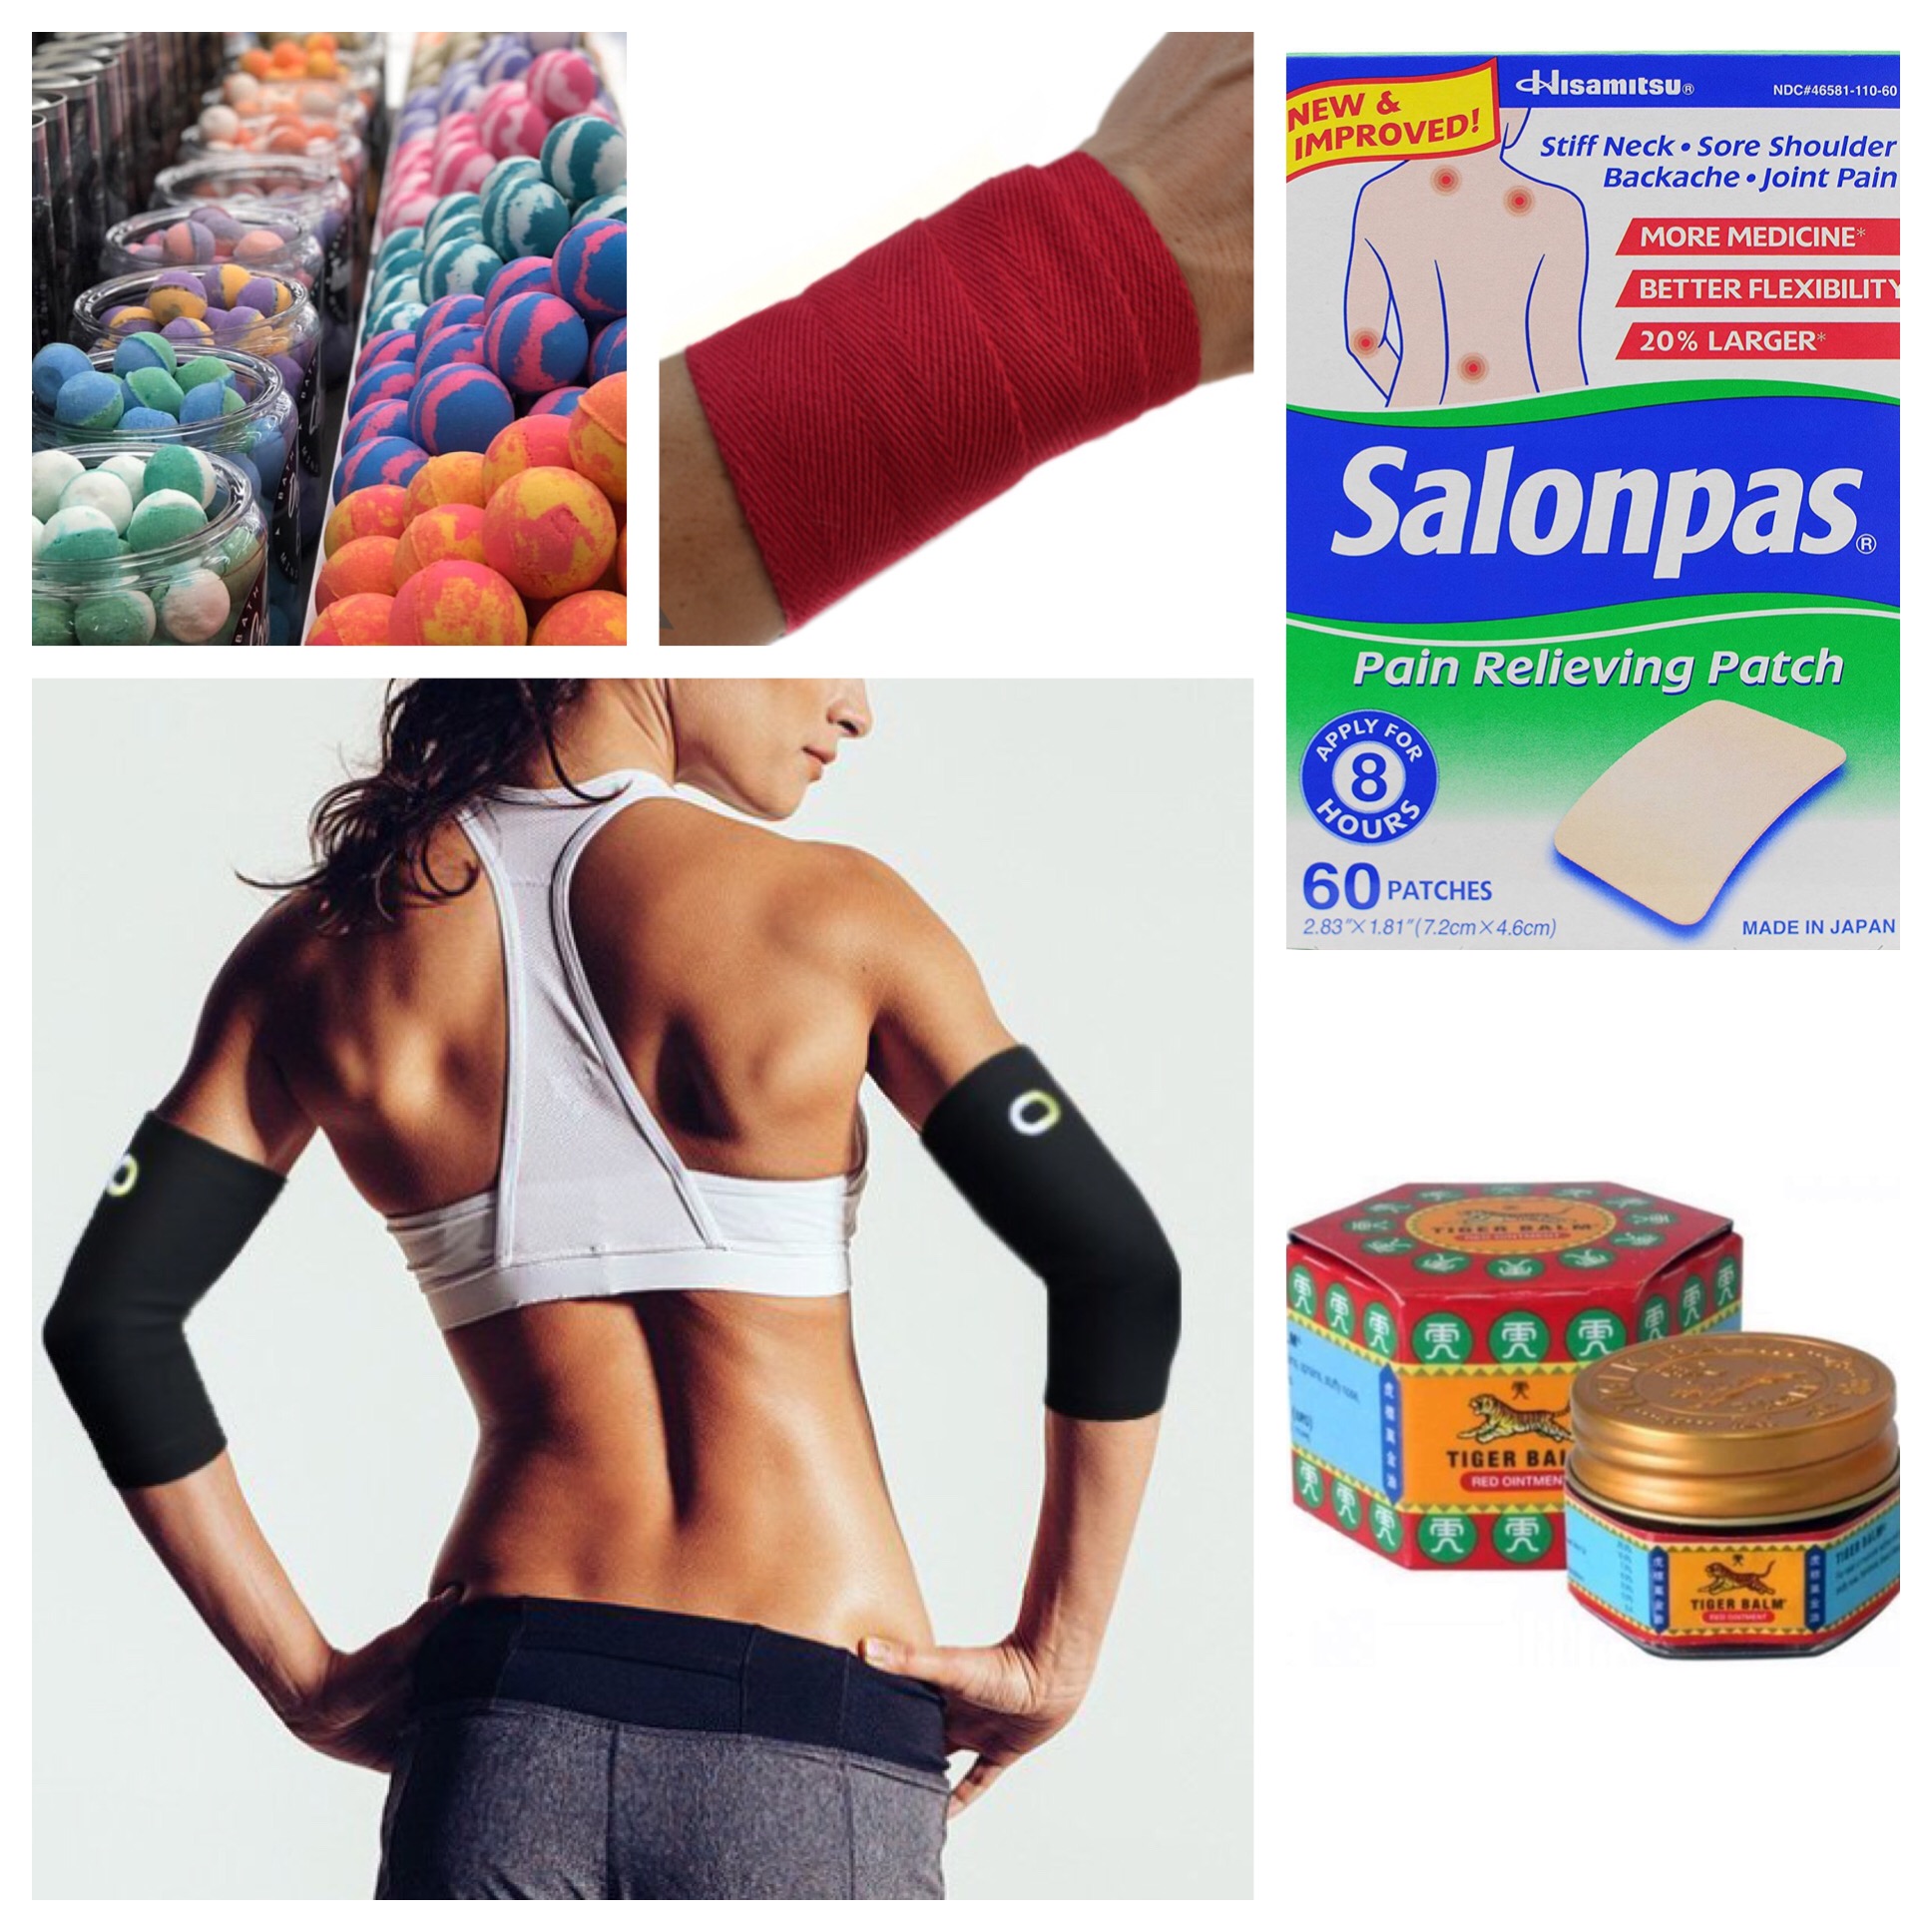
AchesPains

o Tiger Balm
o Salonpas patches
o Tegaderm
o Bath bombs/Epsom salts
o Elbow sleeves
o Ankle booties
o Wrist wraps

Tiger balm or any type of muscle cream is great for larger areas of tenderness if an individual can’t make it home to soak their weary body in a hot bath with the relief of a bath bomb or Epsom salts for recovery. I, personally, love Salonpas patches. These are a great help for those “trouble spots” that haunt many aerialists. These give a constant tingle to a small area for a longer period. I have a spot on my upper trapezius that gets angry some days, but if I throw a patch on there, it relaxes up and doesn’t inhibit my training. Tegaderm is useful for more aggressive abrasions and scrapes that occur. These are far more helpful than Band-Aids because they stay on during high-intensity fitness activities. Ankle booties, elbow sleeves, and wrist wraps are all gear to wear during training for those painful skills these intense athletes strive for: ankle hangs, elbow circles, reverse flag, etc.


The Tool Gathering Guru

This aerialist has all the training accessories a person could ever need! Their apparatus alone will not suffice and various things get purchased to assist in developing that hard to target muscle for strengthening or flexibility. For these individuals, consider the following:

ToolGuru

Peanut/Lacrosse balls
Resistance bands/loops
Yoga blocks
Superbands
Back Warmer
Finger extensor strengtheners (rubber bands, live strong bracelets, etc)
Grip strengtheners
Rosin spray/powder/grip aids

While many of these can be purchased at a general fitness store, some of these are more obscure, like the peanut. If the aerialist your love is primarily a flyer, they might need to balance out their grip with finger extensor condition. If they are a handstands fanatic or hand-to-hand acro enthusiast, consider the reverse and give grip strengtheners. Many aerialists can be picky about their grip aids. Chalk, powder rosin, rosin spray, dry hands, dew point, etc. Invest here with a little caution, but if you know their grip aid of choice, then it’s an easy investment to include in a stocking and will get used happily.


The Budding Performer

This individual has found their expressive stage through the circus life! Signing up for every studio showcase, auditioning for every aerial slot available, this soul is meant to run away and join the circus. Taking classes is a mere tip of the iceberg for their expressive heart. Performing comes with its own list of special things and here is a good start for gifting to your circus ham:

Budding Performer

False eyelashes
Face jewels
Rhinestones
E6000 Fabrifuse (non-toxic)
Nude Fishnets
Makeup remover
Facial masks

Things that make them dazzle are key! I love using false lashes when I perform, but I’m terrible with putting them on and mess up the glue EVERY time, so I personally use magnetic falsies. Full DISCLOSURE: I am a brand ambassador for the ones linked, but am not being paid to recommend them. I will, however, share my discount code for anyone that wants to try them (MCKELL10). Rhinestones are also their own animal. Swarovski and Preciosa are the best, but glass DMC is a more budget-friendly option while maintaining decent quality. Also, since performers often have fabulous makeup on all the time, a great skin care regimen can be crucial, along with items that help maintain their beautiful faces.


The Equipment Accumulator

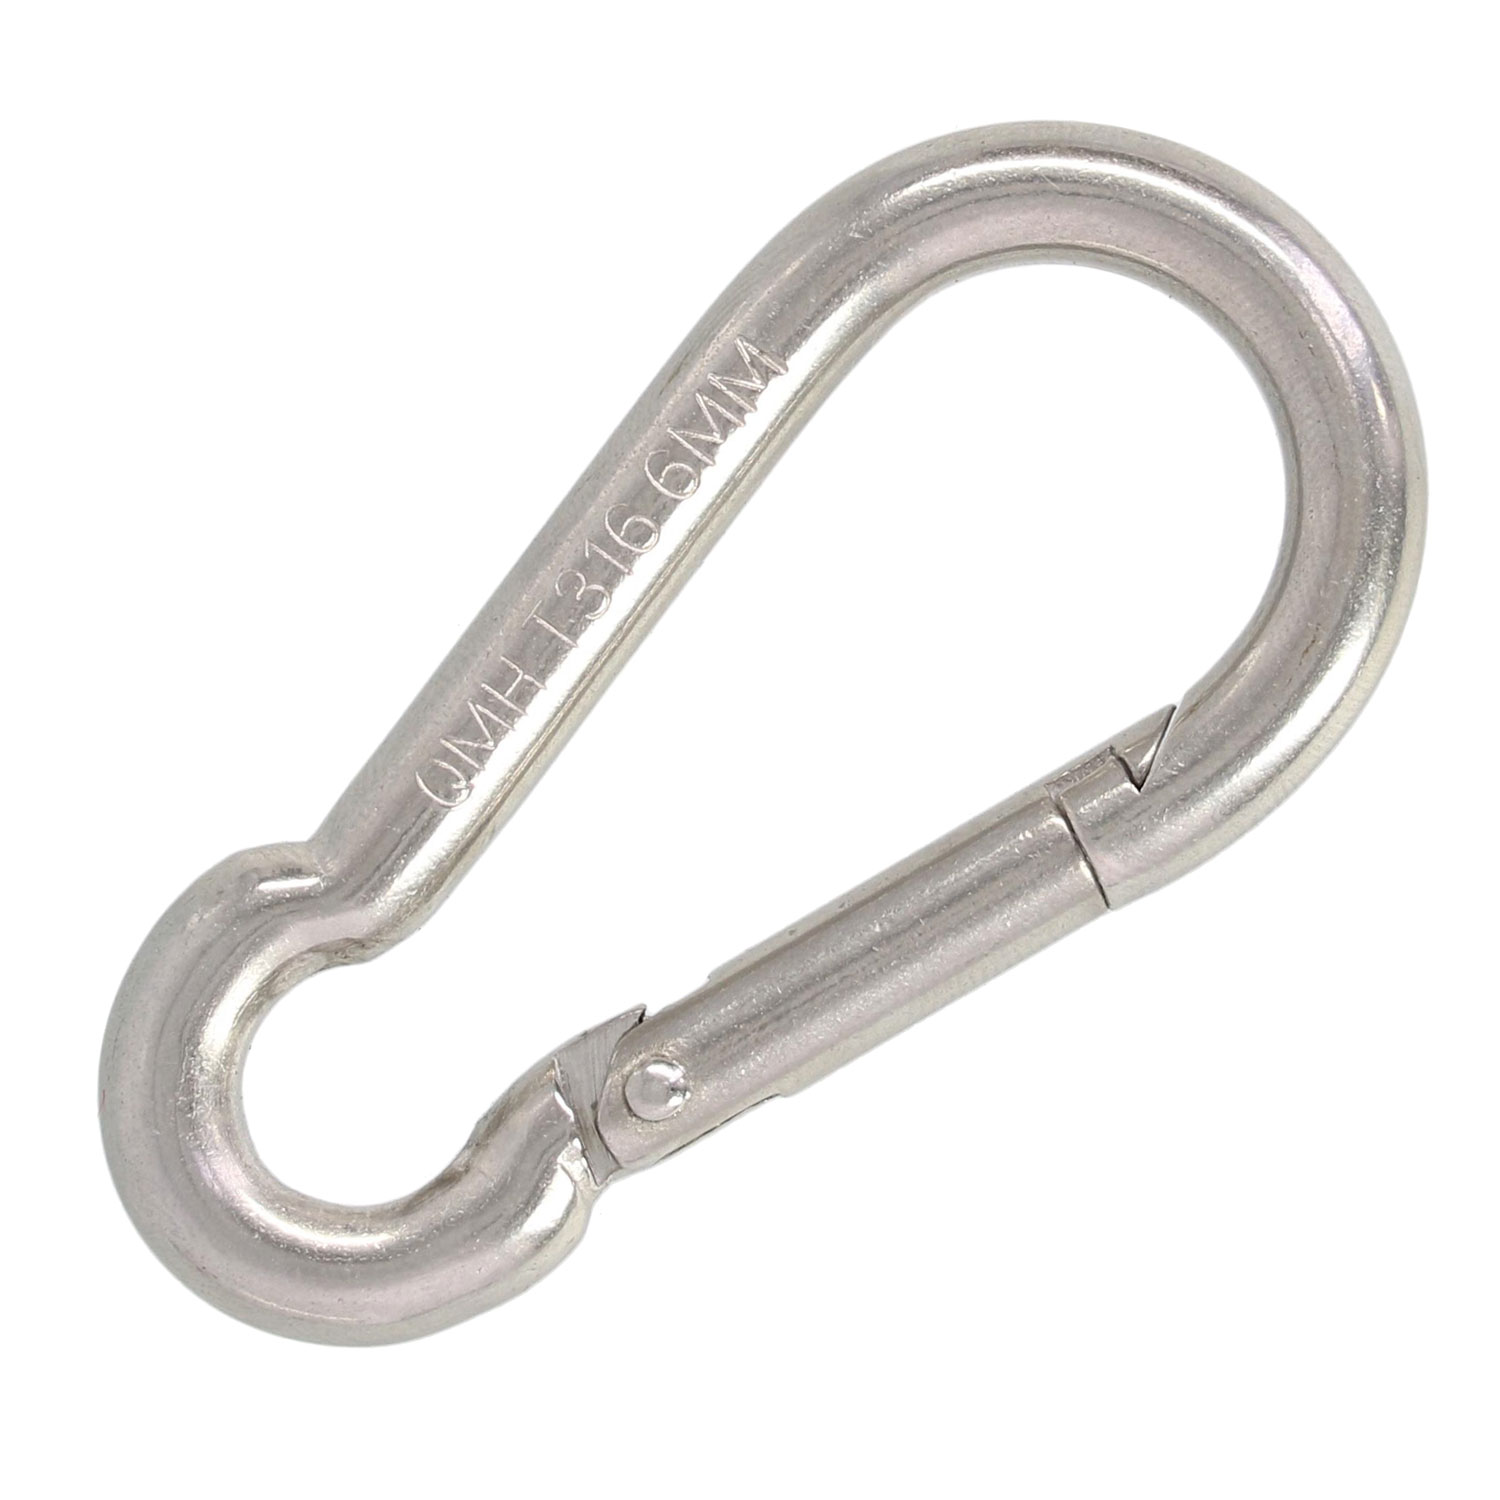
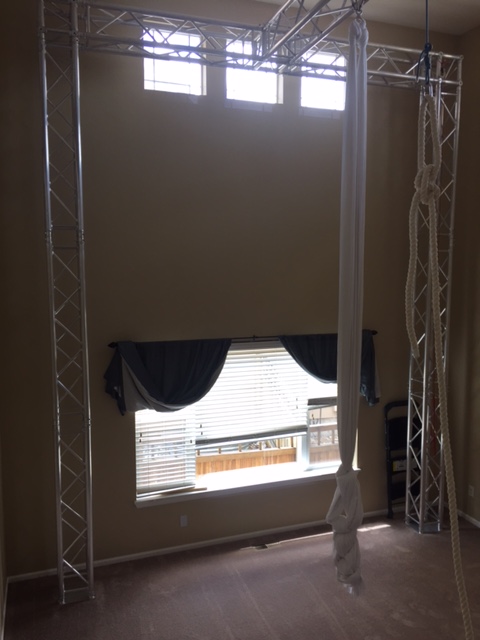
This individual might also be referred to as a Circus Investor. Attending classes is not enough, they want their own apparatus, they probably own a portable aerial rig, they scope out ceiling beams and carabiners with a lusty hunger in their eyes. For these folks, I recommend giving these wonderful gifts:
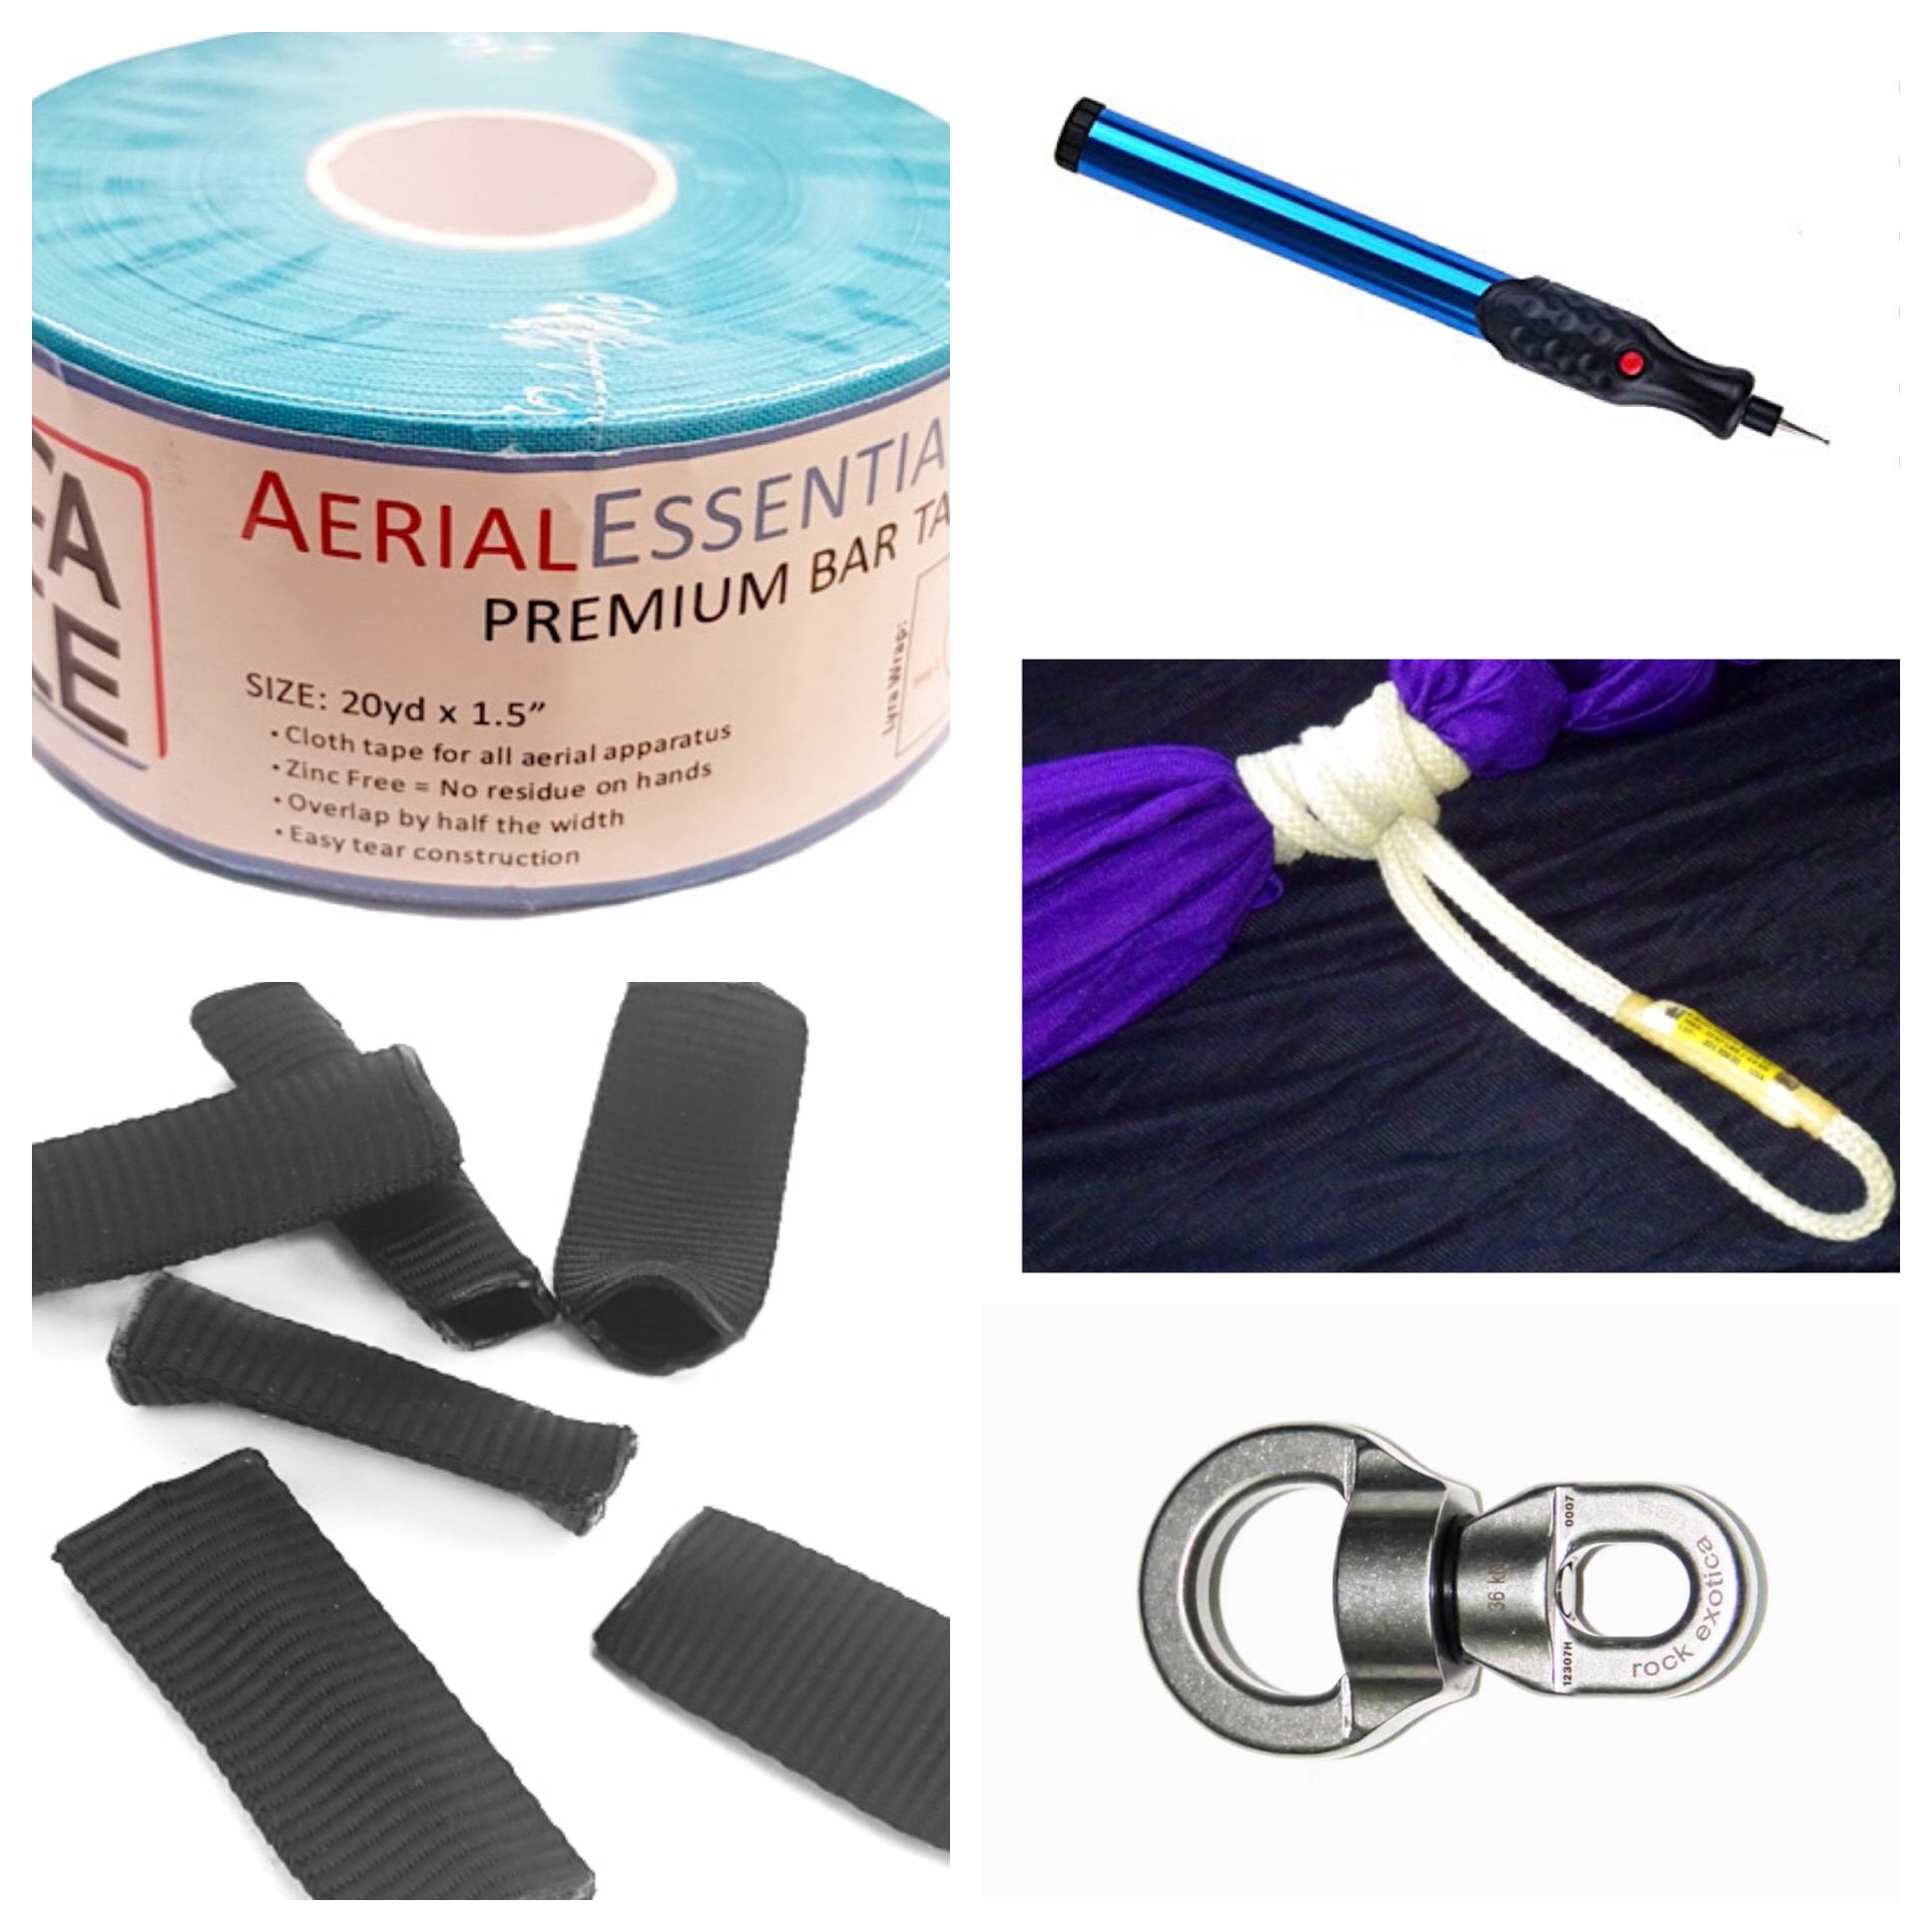
Equipment Accumulator

Athletic tape
Hollow blocks
Carabiners/shackles
Carabiner keepers
Swivels
Etching tool

If the circus love of your life is an equipment accumulator, beware, they are the most expensive circus artists to support. While many of these items might *fit* in a stocking, they can range significantly in price. When my husband gave me a stainless-steel Rock Exotica swivel, I swooned! Partially because it’s beautiful and spins forever, but also because it was a $200 investment, I hadn’t let myself make for ages. I do highly recommend giving the gift of an etching tool for any equipment hoarding circus dragons that love their shiny toys. Etching tools are inexpensive, but help promote long-term equipment marking and inventory management. (Is it obvious that this in my clan?)


In a very short period, this list has become very long.  Personally, I belong to most of the groups listed above and have some experience with most of the things listed.  Others (like rhinestones) I took the feedback from other glorious friends I have that use them.  Hopefully, it includes a few things that will be helpful when picking up goodies for your passionate aerial friends.  Do you have other favorites, not on this list?  Do you have a specific brand you swear by that we missed?  Comment and tell us what they are!


How to Be Judgmental When You Enter a New Studio

Sometimes, it’s a good thing to be judgmental. Particularly when your well-being (and maybe your very life!) depends on it. The goal of this blog is to give you practical tools so that when you walk into a studio, you can make a call for yourself: Is it safe to do aerial here? Unfortunately, sometimes the answer will be NO! It pains me to say it –because I want to believe the best from every human being and every studio–but some people have starting teaching aerial before their safety wisdom has ripened. Stay away from them bad apples.

First — Look Up & Ask Questions

Whatever the rigging is attached to should be able to handle the load capacity for EVERY point that is in operation that day doing aerial things. Here’s a great video to show how a drop can generate 900 pounds in a split second!

How safe are you going to feel on a system that is designed to hold 1,000 pounds? Um, let me answer that for you: back away slowly. OSHA recommends a safety ratio of 10:1, meaning that ideally, the system should be able to handle 9,000 pounds if you are going to be putting 900 pounds on your system. Now, generally, 5,000 pounds is acceptable in the aerial world for each rig point, but hey, higher is always better and safer!!!

Look at what you are hanging from. If you are unsure about anything, ASK QUESTIONS! Don’t be afraid to ask questions. If the owner is insulted, this is a red-flag! Any studio owner who has put years of research into best practices and thousands of dollars into safety is proud to talk your ear off about why their system is super safe, and how the engineers backed up their load capacity numbers well over 5,000 pounds. They didn’t just take some shady chain and loop it around the nearest trussing. (In general, aerial riggers recommend staying far away from chain. It is unpredictable in load capacity around beams and not suitable for most aerial rigging.)

Look at the Attachments

The big beam holding all your weight should look and feel sturdy. Next, we want to draw your attention to all the attachment points. If carabineers are being used, are they closed and locked? Are carabineers turned sideways or tri-loaded? Here’s an example of a carabineers that should NOT be used EVER for aerial work:

carabineer

I have seen cases of the above being used for aerial hanging. I would use this carabineer to hang my keys in my purse, not to hang my life. It’s a fine carabineer for other uses, but NOT rated for aerial. It’s working load limit is a dinky 180 pounds.

While many aerial riggers have a preference for steel carabineers, this is not law, and aluminum is okay, as long as it’s one that is rated for a minimum of 2,000 pounds (again, higher = better). Some red flags to look for no matter what carabineer is up there is side-loading. Side-loading a carabineer is a big no-no. A carabineer has different ratings based on how it is loaded and the best (not to mention safest!) is to always double check your rigging to ensure that carabineers are in their normal vertical positions.

Another no-no when it comes to carabineers is leaving them unlocked or unscrewed. This is a no brainer, but I see it happen a lot with new/less experienced riggers! No leaves it open on purpose, everyone can be forgetful. That’s why I teach my teachers that they have to go “clickity-click-click-it” every time in an annoying — but helpful for memory — way.  Having a routine that requires you to double check everything helps to avoid simple mistakes.

Screw-gate carabineers should “screw-down so you don’t screw up!” This helps for long-term safety as gravity can unravel a carabineer.

Another no-no for carabineers is tri-loading. I see it all the time, but it’s not how a carabineer is supposed to be used. It shouldn’t be done! Here is a great video from Vertical Art Dance (highly recommend their equipment and rigging services) that discuss this topic and more:

Thank you Vertical Art Dance for spreading aerial knowledge!

Tragically, this past year, Sam Panda was in a rigging accident and broke her neck from 13 feet up. I post the following video only to encourage everyone to seriously consider the consequences of faulty rigging. Thankfully, Sam Panda was generously supported and funded by the aerial community to support life-transforming surgeries and she is recovering just fine!

Warning: The following video displays the fall and may be hard to watch.

Look at the Equipment

Recently,  I visited a studio where the fabric had a ton of holes in it.  It was a high-volume, high-use studio, so it was a natural part of the game. Thankfully, it was run by teachers who knew how to conduct proper inspections of equipment. For small holes, the holes were sown up, sealed, and marked with permanent black marker. If the holes got too big or grew, then the fabric was retired. Everything was kept track of, which is an important part of running a large operation. I’ve heard all the stories including wooden bars of a trapeze breaking when someone landed with a little extra force (wooden bars are no longer used for general aerial classes), lyra breaking, rigging splitting and coming down, ropes untying, and more. You name it, I’ve probably seen or heard of it happening. Better safe than sorry. Old equipment should be retired. New equipment should be bought from trusted vendors.

Look at the Mats

First of all, make sure that mats are present!!! While mats cannot guarantee protection, they are sure going to help. When it comes to mats, aerialists prefer ones that are at least 8 inches in thickness. As always, the more, the merrier. The thicker, the better. The wider, the safer. Some mats are pretty dinky, making a small target to hope that your head lands on when you are swinging around 10 feet up. Look for generous sizes and that they are used WHENEVER possible. There is no reason to leave the safety of mats when learning new moves. Some cases are exempted when the performer becomes advanced and wishes to incorporate ground choreography and the mat gets in the way. But, this is an exception. The rule should be that in all general aerial classes, especially those were the participants are learning new moves and their feet are leaving the ground, there should be mats. And not just some thin, dinky thing that does nothing. A good, sturdy, solid mat. It’s a display of caring about the students and the studio.

Look at the Teaching Methods

The big things we are looking for here is warm-ups and proper progressions. Just holding some stretches is not a warm-up. You must do something that builds heat in the body and then you must get mobility in the joints through any variety of methods. More on great warm-ups can be found on a previous blog here.

When we look at the curriculum, what we are looking for is how assessments are made, and how moves are ordered. If day 1 for a new fabric class is cross-back straddle, this is a problem. This may have been the first move 10 years ago, but there has been a ton of progress in aerial education since then! It is now understood that cross-back straddle can be a very difficult move for many beginners and that proper care must be taken to build up the strength required for its proper execution. It goes hand-in-hand with straddle inversion strength which should be assessed for before a student works at this level. (There are always exceptions. You may have a strong gymnast who can handle a cross-back straddle in a private lesson on their first day on fabric. However, even in this case, we would assume that strength was assessed and that they are skipping levels only because strength was assessed and they passed. We are addressing the general rule of thumb for classes to the general population.)

Many aerial teachers of today are aerialists who learned fast and learned many advanced moves early in their training. When they go to teach beginners to today, they often are at fault for teaching the same moves that they learned first. Many students are not ready to go that far that fast. The more that aerial grows, the more we must grow our depth of beginning programs and beginning material because we are attracted more and more people from non-gymnastics backgrounds who may take quite the journey to find their inversion strength. We must offer them the proper strength-training regime so that they are building strength safely and slowly.

If a studio lets you learn drops on day two, this is a huge red-flag!!! Drops are the candy of aerial, and some studios think that by letting people learn them, they will be a booming aerial business. I’m sure they will, but they will also have a booming business with the nearby rehabilitation center. Drops and other high-level candy of aerial must be earned through proper progressions and body awareness growth. If you go a studio and think “This is too easy and low to the ground,” you’ve probably found a SAFE studio. Don’t worry — you’ll eventually be flying. No one is out to keep your wings clipped. Safe instructors are there to prevent you from jumping out of the nest before you have strong wings period.

Trust goes both ways. A students must trust the studio and the studio must trust the student. A studio can only trust the student by giving them one small task at a time to see how they handle it. If you are flailing at 2 feet off the ground they shouldn’t trust you to go 10 feet up. You shouldn’t get to fly 10 feet up without demonstrating you are trustworthy first. You may feel like your being babied at the beginning, but as long as you see other students who are flying high at the studio, stay with them. Once you pass the assessments and show you have the proper strength and control, you will benefit from their progression training. You will soon find yourself SOARING HIGH with wings that have been molded and chiseled in a way that only diligent training time can give you.

Some things to look for: When you train too hard too fast, your elbows will start hurting you. This means that you are putting too much weight on bent arms without first building up the strength in increments. A good instructor will have the answer to this right away. If not, e-mail me and I’ll send you my program to help prevent this and heal in the next couple weeks!!!

For parents, it is important to note that your child should not be practicing footlocks without first being assessed for proper ankle strength. When a child does too many footlocks without having firmly established ankle strength, they are at risk for deforming their growing bone structures. We have seen studios break out with an epidemic of foot problems due to having young students (under 12) on footlocks, and allowing them to sickle, not watching for strength or body awareness. Anyone can teach a footlock and a basic leg roll-up. Few people know exactly when and how to properly teach it.

As you can hopefully tell, I’m extremely passionate about proper teaching methods. That’s why I started the Born to Fly Teacher Trainings & Support Systems for teachers. While I do not believe that every teacher should be trained under our system, it can be a powerful tool out there to help raise the standard for aerial education. When looking for an aerial teacher, you can check on their certification at the following link: http://www.borntoflyaerial.com/certificate-holders.html

We have had people falsely claim to be Born to Fly Certified when they were not. It is always good to check on certifications. No one who is certified will mind. Quite the contrary. The will be overjoyed that you value their hard-earned certificate!

One last important note:

Our studio directory on this website does not endorse the listed studios, nor can it vouch for the safety or training methods at the various studios. Please become as educated as you can and start asking all the right questions as you enter a studio, listed in our directory or elsewhere. Be safe and happy flying!


The 5 Rules for Having an Aerial Rig in Your House

For the first time in 8 years, I have a rig in my house. We just moved back to Colorado, and I picked out our house based on the fact that it had a living room with 17-foot-tall ceilings. As soon as I saw that, I was sold.

Even though I knew I was destined to rig in my house (how can you not with 17-foot-tall ceilings?!), I didn’t quite know how I was going to accomplish this goal. I have three portable rigs, but they are all like swing sets and require an exorbitant amount of space in their footprint, so I couldn’t exactly put them up even if I was desperate enough to want to try.

I have several friends who have rigs points mounted in their houses that look seamless and that’s what I originally wanted. I was so that 5 year old all over again “But this is what Sally has in HER house.” We had a general contractor around doing some work on our house (for other things), so he was the first person I asked to see if he could help me do it. He said that he would do it if I found a structural engineer to create plans so that way he could guarantee that it would hold the required loads. Well…as you know, aerial rigging loads are high as they need to be to be safe, and that’s not an easy thing to do with what’s in your house. Bottom line: It’s typically not safe to rig into the structure of your house. It’s not designed to handle those loads unless built from the ground up to do that or reinforced with the stamp of an engineer to handle required loading.

So I knew I had to find another option….

I have been working with top-notch aerial riggers in getting my commercial space ready for use, and they suggested trussing. At first I was hesitant because at one point, I remember reading that the WLL (working load limits) on truss are low. And, sure enough, they can’t beat steel. But, turns out, they are going to be perfectly suited for all of my aerial needs. I know my loads, what I generate and what my friends and students will be doing. I’ve paired this knowledge with the span of each truss and what the WLL of each truss is, and it’s going to work!

To do it right, you will need to build a structure within your structure.

IMG_0091IMG_0093


PLUS, the best part was working with Vertical Art Dance, which is who I ultimately ended up buying my truss system with. I had the best experience buying with them. They took time to get all the measurements of my living room and helped me design a T-shape that frames my window on one wall, and hides behind the buffet table on the other side of the room.

I really wanted adjustable points that were going to fit my budget and Vertical Art Dance even taught me new methods of rigging! For the rig in my house, I’m using a hollow block on my rope that adjusts easily and the rigging didn’t cost a fortune. (More blogs later about rigging.)

Now the truss on the other hand… I’ll admit it’s not cheap. But it’s an investment that is going to be worth it for my aerial-addicted self!!! I’ve already used it to prepare for several performances.

My truss arrived just a few short weeks ago. My husband got right in there and started putting up the truss. We put up the first layer of the cake and then had to wait until we had a larger crew to lift up the truss for the next couple layers. Having the first layer of the truss in the living room for a day was fun. I couldn’t keep my daughter off it, for one. And secondly, I was finding new ways to incorporate a horizontal fixed bar into my aerial yoga practice. It was great fun.

IMG_0137IMG_0197


We had a team of four strong men to lift the truss all at once. In hindsight, it would have been much smarted to take the advice of Vertical Art Dance, and put up the truss at more of a rotation in the room, allowing for more of the tilting to occur, and then rotate into place when the truss was up. But we went for the brute force way. It got done.

If you do have a home rig, it’ll take your practice to the next level, but I have some words of advice to consider regarding setting up at home:

Rule #1: Home rigs = Not for beginners.

I know that you are really wanting to practice your newly learned aerial moves at home, but that’s not the place for a beginner to practice. If you are looking for ways to up your game at home, there are plenty of ways! You’d be surprised how much you can do to support your aerial that’s not directly aerial. If you have access to a pull-up bar, you should check out our latest series: NONE to ONE Pull-Up Program.

Rule #2: Never practice alone.

It can be tempting to practice on our own if the rig is right there in the middle of the room and you are in the mood to workout. If you can’t fight the temptation, then the aerial community would recommend that you don’t get a rig in your house.

Rule #3: Never attempt things from the internet that you are unfamiliar with.

We have over 550 moves in our video library, but hopefully you’ve noticed, we don’t advertise our site as “Learn Aerial Online.” No one should be advertising that to the aerial community. It’s not safe.   You should always learn new things from someone who knows the move. Then they can tell you what wrong thing will happen if you hook this way instead of that way, etc. Then, use a resource like AerialDancing.com’s crazy library to review moves, or find new variations to moves that you are already familiar with.

Rule #4: Don’t do drops without a trained aerialist spotting your wrap.

The second rule–about not practicing along–is in case something happens, you have someone who can call 911 or somehow help you down. THIS rule is to prevent something from going wrong in the first place. Only another trained eye can spot what’s right/wrong in a wrap, so get with them when you are going over drops. Heck, I’ve wrapped wrong for drops I’ve done a 1,000 times. It happens. I was in an open gym, but no one was watching me, and I missed half a wrap. Thankfully the fabric caught me 10 feet later, but it wasn’t comfortable. It could have been prevented had someone been eye-spotting my wraps.

Rule #5: Warning -everyone will want a piece of that.

You have an indoor rig in your house. You’re probably the only house in your entire neighborhood that has such awesomeness. Have a good time with it. Just please don’t start giving private lessons to every friend who wants to learn unless you are ready to go into teaching. In that case, get properly trained and then use your friend-teaching hours as part of your training process under guidance of a mentor. Check out a program like Born to Fly Teacher Training Programs & Support for more.

If you have kids, those kids will bring around other kids who will all want to go on your rig. Set boundaries about what you will allow and won’t allow. The most important thing is that you are looking out for everyone’s safety.  Kids are quick to climb fast and say that they are being careful, but they don’t always think about how they are going to come down, and they love jumping down. Perhaps you set a limit on how high kids can climb, if you let anyone else on your equipment at all. (And remember that adults are just big kids.) You are liable, after all.

Hope this has helped you think about your home-rigging situation. I’ve survived with my pull-up bar and resistance bands for the past 8 years, so if that’s all you can afford right now, don’t be discouraged! It took me 10 years to get to the point of not only being able to afford this rig system, but also how to use it to its full potential and most importantly, safely.

FINAL RULE: Don’t compromise safety for your fun.

We didn’t talk about loads in this article, because that’s assumed from the get-go. But, not everyone understands that. In short, I will leave you with this great flyer that many in the aerial community will recognize. It’s great to put up in your local studio to remind people that to safely suspend a person, you’d need to be able to suspend about the weight of a car.

You can download this poster from the Born to Fly Resource page or from www.CircusBuilding.com.

riggingstandardlowres

VAD-Logo-webFor more information on truss systems for aerial rigging, please visit VerticalArtDance.com.