Everything Hurts and I’m Dying: How Much Soreness is Too Much?

Authored by Dr. Jennifer Crane, PT, DPT, OCS, ATC of Cirque Physio.

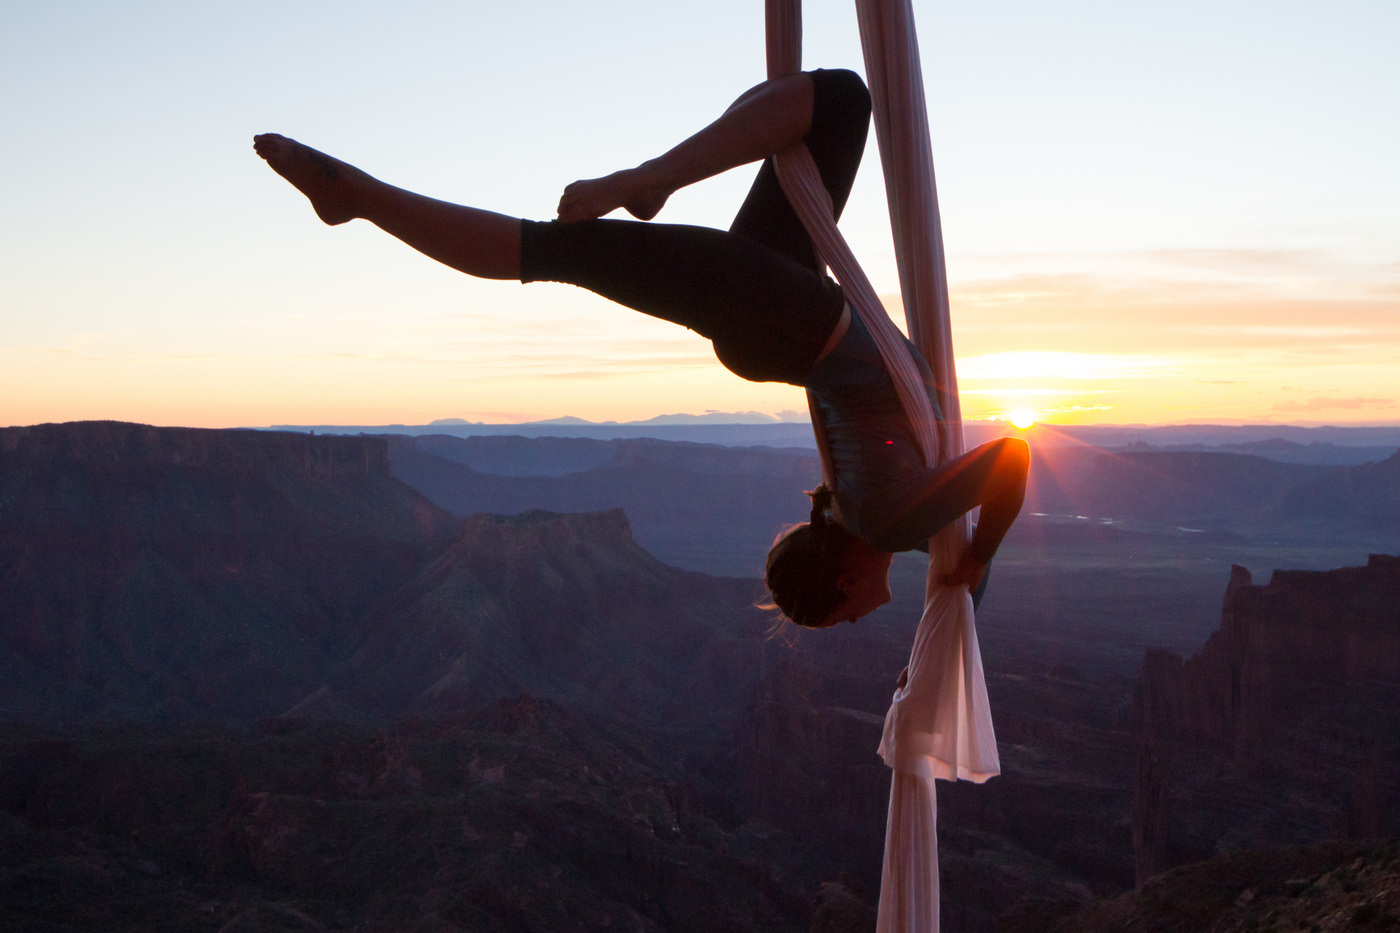
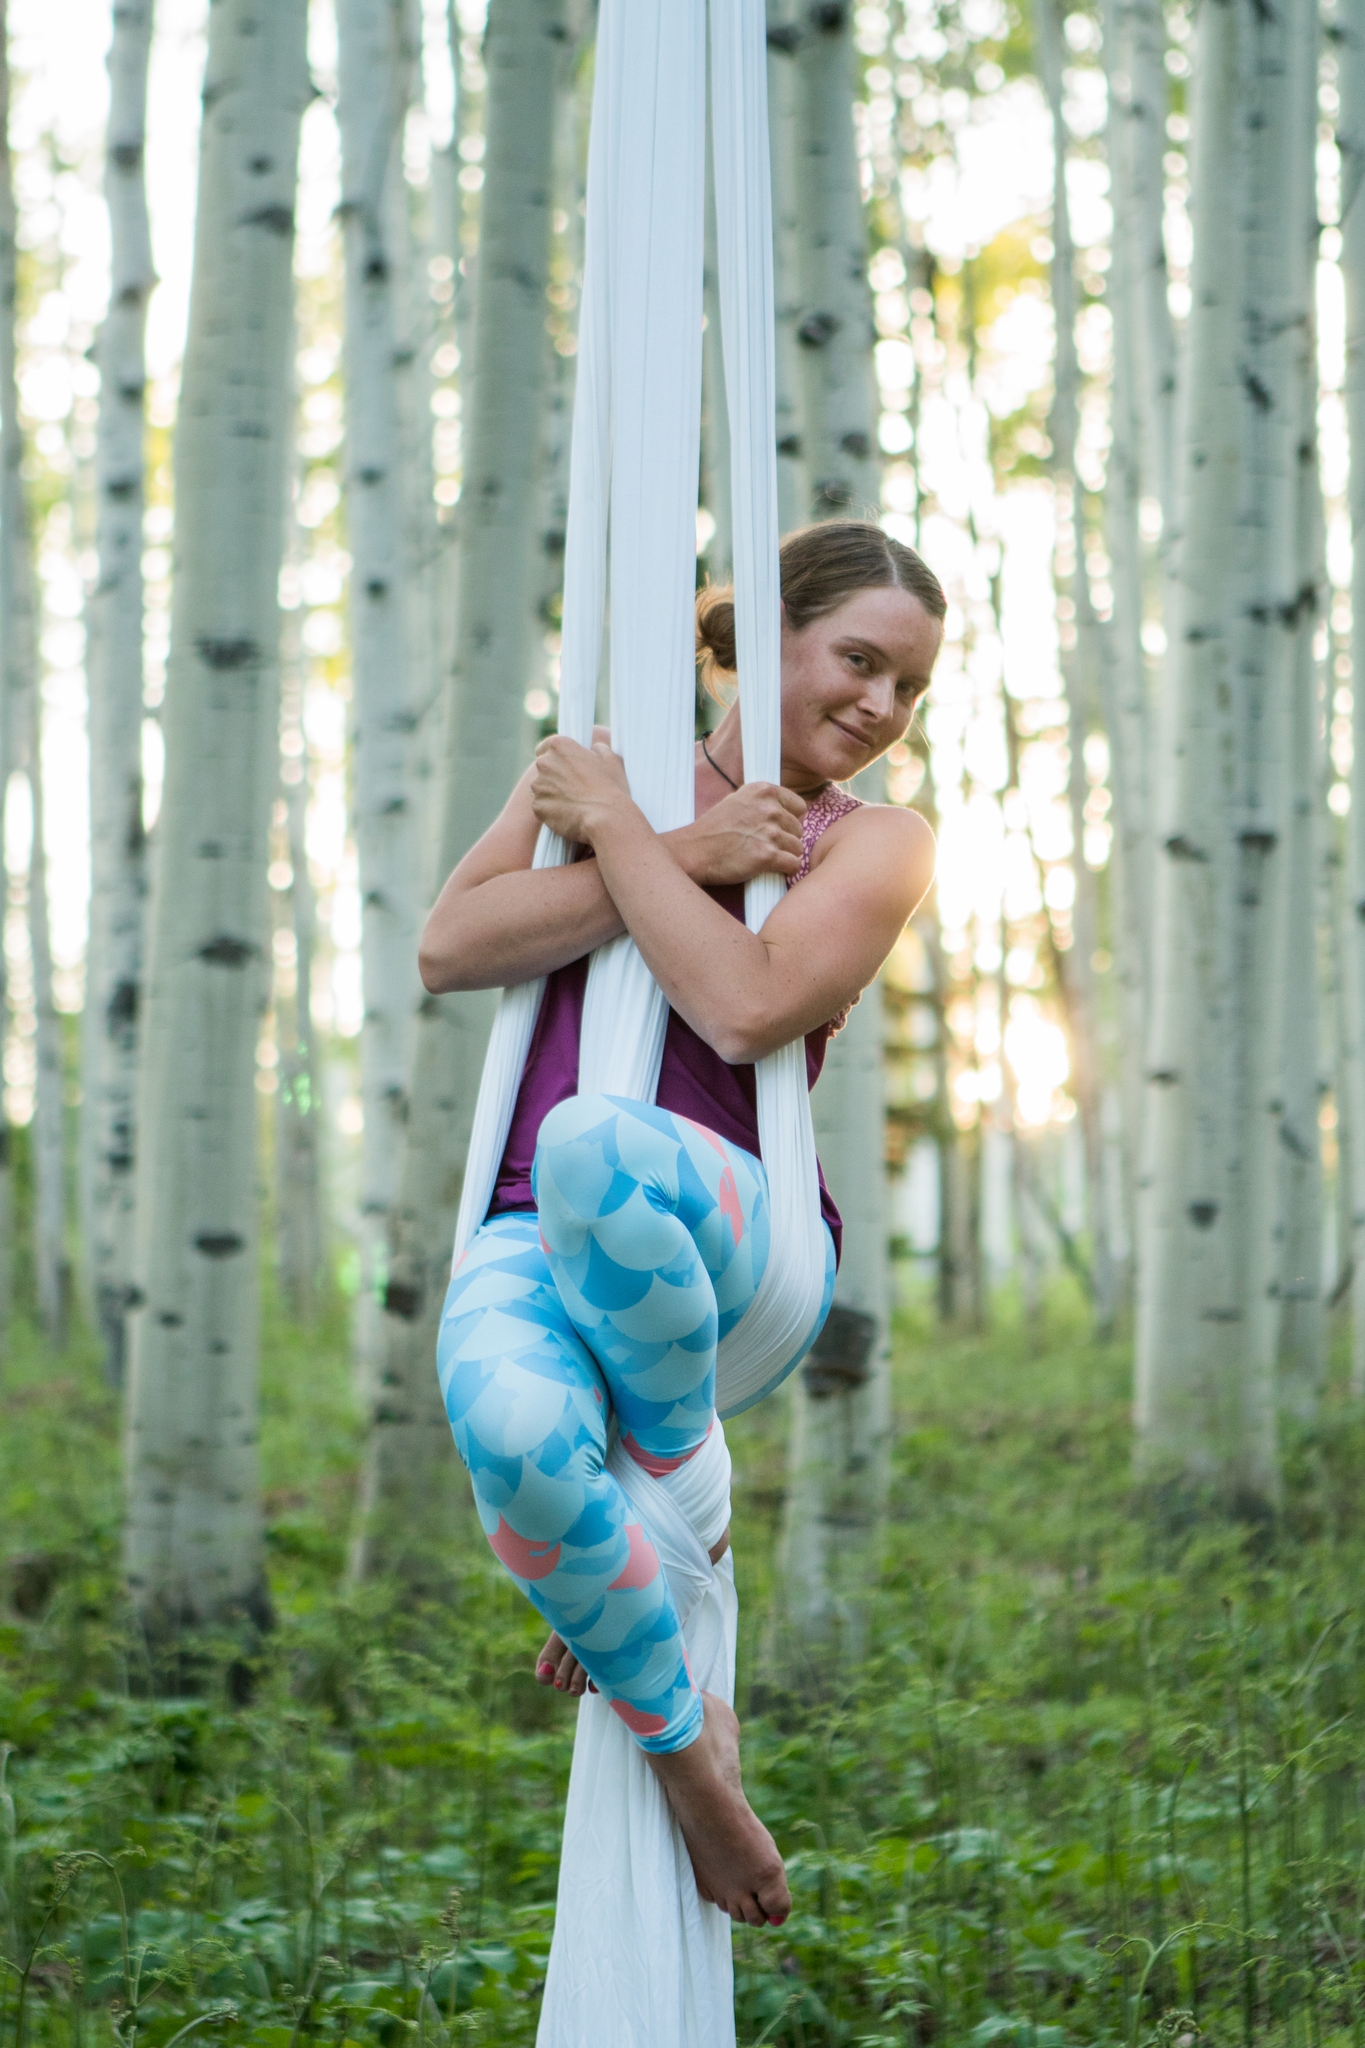
What does current performing arts culture tell us about muscle soreness? Aches and pains? Bruises, burns, and rope rash?
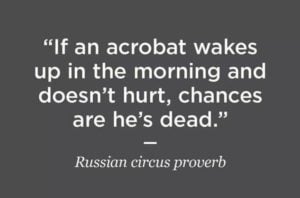
“CIRCUS HURTS.”
“Train through it.”
“Tears are for home, not circus”
“Here, have some circus candy (advil/ibuprofen).” 

These are all common “circus-isms” that I’ve heard, and I want to talk a bit about soreness- is it productive? How much is too much? How do you train optimally while simultaneously avoiding OVERtraining and subsequent injury?

This is a HUUUGEE topic, and I’m only going to address a small component of it in this post.
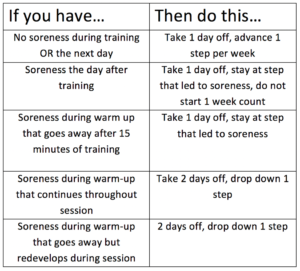
​I was recently reading an article on implementing pitch counts in little league players (woah, #notcircus?! I know…what was I thinking…) and it REALLY got my gears turning. Not because I love baseball (…I don’t), but because one of the criteria they used for progressing pitch intensity and frequency was something I felt could also be applied to circus artists who are returning to training after a long hiatus, or even to those who are wanting to progress skill and strength levels in an efficient amount of time, without getting injured.

THE SORENESS RULE

​This criteria for training progression is referred to as the “Soreness rule.” It was initially created for pitchers, but has since been adapted and modified to fit other sports as well (running, weight lifting, etc). These rules give athletes the ability to modify their progression of skill/strength according to the soreness they experience. If the athlete feels sore, tender, or stiff, then they can use the soreness rules to guide their training for the rest of that week.

BUT FIRST…

​Here are the ground rules before I dive into WHAT the actual soreness rules are:

  1. THESE DON’T APPLY IF YOU’RE INJURED.  If you have pain that is NOT from working out a muscle, GET IT CHECKED OUT by someone who’s qualified to do so.
  2. These rules are based on stepwise progression of overall training volume, strength or skill acquisition. This means that before you get started, you need to create multiple steps/phases of training- whether its breaking a trick down into 5 phases, or just generally increasing the number of hours you train per week. For example: if you’re an aerialist that is coming back from having a baby (and have been cleared to return to aerial by all involved healthcare providers), you should first sit down and create a multi-phase return-to-full-time-aerial plan. This must be well defined, so work with a qualified coach to do so, if you get stuck!
  3. Ok, sit down for this one…I’m serious, you’re not going to like it. EACH TRAINING DAY SHOULD HAVE ONE DAY OF REST BETWEEN to ensure proper recovery and adaptation to the stimulus and load!!
    1. Yeah, I said it. The “R” word. In this context, it doesn’t mean complete Netflix and chill bedrest status for 24 hours, it just means that if you’re working on an upper body skill, to give your upper body a break the next day. Yes, handstands count. Yes, contortion counts. Yes, vinyasa yoga counts. Yes, one day = 24 hours.
  4. Each step/phase in your progression should last for at least one week. This means that you should be working on whatever conditioning/training drills comprise ONE step for SEVEN DAYS- without soreness. You must be able to do step one, completely free of any muscle soreness, for 7 days before progressing to step 2. If you have soreness during step one, you stay on step 1 (with 24 hour break between each training session) until you’re doing it WITHOUT soreness. For 7 days.
    1.  I do realize I just said the exact same thing three times. I’ve had the rest day conversation with enough circus artists to know that repetition is key, and over-defining each term is required. It is also often required for me to define how many hours are in a day, and how many days are in a week. 

CLIFF NOTES VERSION

 ​Overwhelmed? Here’s the cliff notes version: Pick a skill to work on, or an overall training goal. Break the goal down into at least 5 steps. Assign drills and conditioning for each step. Start with step 1, and don’t move on to step 2 until you’ve been doing it every other day for one week, without any muscle soreness.

Oh yeah…one more thing. WORK WITH A QUALIFIED COACH.

​PRESENTING: THE SORENESS RULE


YOU’VE GOTTA BE KIDDING ME.

Alright, there we have it. The rules. You guys, I KNOW. Your heart rate and blood pressure just spiked, and you’re getting anxious just THINKING about all those rest days, and how slowly you think you’ll progress. I’m aware that in the circus world, these rules seem SUPER conservative.

​However…as a circus PT, at least 80% of the injuries I treat are from overuse…too much training, and too little rest. These injuries tend to last upwards of 3 months (because again, no rest…) and can significantly impact performing artists career length and career quality. The kicker is, these injuries are caused predominantly by modifiable risk factors…aka, proper dosage of training and adequate rest. So yes…I understand that you’re panicking thinking about this. And yes, I understand that implementing any big change in training program is something that does NOT happen overnight, but I think these rules have a potentially huge positive impact on the overall rate of overuse injuries in circus artists, and I think there’s value to planting this seed in your minds…even if you don’t actually DO anything about it for a while!

As I said, the topic of adequate rest, proper training load and volume, as well as overall periodization of training in circus arts is a MASSIVE subject. I’ll likely have a few more posts on this topic, so if you have any specific requests, leave them in the comment section!


DR. JENNIFER CRANE, PT, DPT, OCS, ATC

Dr. Jennifer Crane is a physical therapist, athletic trainer, board certified orthopedic specialist, and published author. She has been a sports medicine professional for eight years, and has worked with a wide variety of athletes and performing artists throughout that time. Most recently, she worked as a physiotherapist living in China with the Chinese Olympic Teams in preparation for the Rio 2016 Olympics. While in China, she worked with multiple sports teams: diving, weight-lifting, fencing, gymnastics, synchronized swimming, and track and field. Of the athletes she worked with, 18 of them went on to get an Olympic gold medal in Rio.

Now happily back in San Francisco, Jen’s practice is based at Circus Center, where she specializes in injury prevention and treatment of athletes and performing artists. When she’s not working with circus artists, she can usually be found standing on her hands, swinging on flying trapeze, or spinning on a single point trapeze.

Click here to visit Cirque Physio.

How to Perform the Perfect Aerial Photoshoot

You’re performance ready, but are you photoshoot ready?

_dsc0744-edit


A performance usually lasts 3-5 minutes, but a photoshoot lasts at least a half hour (usually more). A performance is about flow, movement, and suspense. A photoshoot is about accentuating body lines and capturing the feeling of the movement. Here are some tips to help you be as prepared as possible:


1. Pick your poses wisely.

This isn’t about showing off every move you’ve ever learned, so be picky.
Choose poses that photograph well. Not all poses do. You and other aerialists know how difficult certain poses are to get into, and how much strength some require. Assume that most people looking at your photos don’t. Before you choose an advanced move to showcase, ask yourself if it shows the lines of your body well. The answer may be no because of the nature of the pose or because it doesn’t show your particular flexibility or strength well (which can change over time). Which brings me to the second part of choosing your poses.


Choose the poses that will really show your best flexibility and strength. For me, this means showing off my back flexibility, but not focusing on splits and straddles. For many of my friends, it’s the opposite – great splits, not so great back bend. Of course you can throw in one or two of your not-best poses in order to be able to compare it to future photos and see your progress, but it shouldn’t be your focus for the shoot.


_dsc7460

Choose poses that allow you to conserve energy. Because a photoshoot lasts a lot longer than a performance, it is in your best interest to choose poses from which you can easily transition into a good rest position. There will be times that your photographer wants you to keep the same pose, but they want to change angles, adjust lighting, or switch lenses. This may take a minute – or ten minutes – so you need to be able to rest. In a studio, you might decide just to come down to the ground during these times, so the pose must not take up all of your energy to get into.

The other side of saving your energy is simply planning an array of poses that doesn’t target the same muscle set. For example, if you can’t hold yourself up by your arms for a half hour straight, then don’t choose all poses that require a lot of arm strength. Instead, stagger them so that an arm-heavy pose is followed by a core strength pose, followed by a hang, and so on.

2. Pick your costume wisely.

Looking your best in photos is also somewhat determined by your wardrobe. Instead of simply picking your favorite workout outfit or costume, consider your location and apparatus, and choose what will stand out from those.

Choose the right color. If you wear too much black, you will often blend into at least part of the background, making it difficult to see your body lines. Intricate patterns also sometimes get lost in the background or make it difficult to see your body lines. If you wear the same color as your apparatus, (white on white as I most often see), then your body lines will again be difficult to see as it’s hard to differentiate between you and the apparatus. Bright colors are always a good idea. Which specific colors depends on your personal style, and the feeling you want to evoke in the photoshoot.

_mg_0073


Choose for your purpose and your body. If your photoshoot is for advertising an upcoming show, then use your show costume or something that fits into the style of the show. Likewise, you can do a themed photoshoot based around a certain idea, using your costume, location, and possibly props to add to the theme – as long as these don’t make it difficult for you to move safely and effectively.

For portfolio photoshoots that are meant to simply showcase your work, dress to impress your clientele: if you do a variety of show types, either bring more than one costume or use a fairly conservative outfit that is unlikely to have malfunctions. I’ve made the mistakes of picking clothing that moved when I came upside down, and a top that the “ladies” came out of after 20 minutes in the silk (luckily my husband is my photographer, so no harm done!).

Solid colors and vertical lines add to the appearance of a long body. Likewise, leggings and catsuits make your legs look longer than they will look in shorts or briefs. Horizontal lines and too many breaks in your outfit will make you look shorter and wider. You can definitely still choose some fun elements to your outfit, but try to choose ones that are flattering and don’t get in the way of your movement.

3. Think about extension and feeling.

The same passion and feeling that shows in your performances should show in your photos. Even though you don’t have the flow of movement to convey your message, you can still convey emotion through facial expression and lines of the body. This concept is the same for aerialists and ground dancers alike.


Point eyes and hands with purpose. The most telling part of your body is your eyes. This doesn’t change in photos, even when you can’t clearly see your eyes in the photo. That’s because where your eyes look, your head follows, and your head position changes the position of your body. Generally, if you have one arm extended, look toward your extended hand for the most feeling. Both your hand and your eyes should either point out from your body line or in line with the apparatus (especially with vertical apparatuses such as silks). Below is an example from one of our recent photoshoots. Notice the feeling you get from the photo on the left versus the right, though they are technically the same pose.


_dsc0519 _dsc0522


When you have both arms wrapped or in use in the apparatus, look along the lines of your apparatus (up or down, whichever’s most natural in that position), or wherever keeps your head in “neutral position” in line with your body, neck elongated. You can still look toward your hands in most positions.


_dsc0925


When both arms are free from your apparatus, they should contribute to the feeling of movement either by extending back in line with your body or above your head into a natural, slightly bent position such as ballet’s “fifth position.” Of course you aren’t limited to these, but take cues from ballet and other dance forms for arm and hand placement. When both arms are out, your eyes no longer follow your arms, but instead your head maintains a “neutral position.” First photo below shows me (Kaydee Barker) in extension, second is of the stunning Jocelynn Rudig at a recent festival in my hometown of Steamboat Springs.


_dsc0634-pano-edit


_dsc8884


Find your full extension in the pose. Extension is important in evoking feeling as well as showing off body lines. Often, you want to lengthen every part of your body. Extend your arms, your neck, and your legs, and engage your core. Ask your photographer to tell you when your body isn’t straight in poses like plank and mermaid, or when your straight leg isn’t extended all the way in poses like gazelle.


_mg_3054


_mg_9881


Closing notes:

Show up well fed, warmed up, and ready to have some fun! To help you get into the right mindset, consider bringing a playlist with some of your favorite songs to play to. Your preparedness and most of all, your joy, will show up in photos. Have fun!


About the Author:

profile-4Kaydee Barker and her husband Devon Barker (the photographer of all the photographs in this article) travel around the United States and abroad connecting the beauty of the great outdoors with the beauty of the human spirit, as shown through aerial dance. This began as a project they called the “Aerialist in the Wild” project, but grew into a lifestyle, and a lifework of inspiring people – starting with Kaydee herself – to connect with nature and learn to love themselves.


Check out Kaydee’s website or Instagram for more of her work as Aerialist in the Wild, and Devon’s blog or Instagram to learn more about his photography and contact him about booking a photoshoot.

Improve Your Lat Flexibility Safely and Effectively

This blog is a guest article from Jennifer Crane, PT, DPT, OCS, ATC.  <<— Do you see all those titles?! This girl knows her stuff.

In this post, I’ll talk about some common misconceptions I’ve seen in the circus community regarding stretching in general. I’ll also introduce a more comprehensive way we can improve lat flexibility safely and effectively, that also will help to prevent injuries.

There are a few different concepts we need to account for any time we want to improve flexibility of a muscle group. In broad terms, I’ll refer to these as active flexibility, passive flexibility, and end range control. First, here are the working definitions of these terms for the purpose of this post:
Passive flexibility: The total length a muscle can stretch when it is being pushed by an outside source. This could be gravity, like when you’re sitting in over-splits, or it could be in contortion class when your instructor is cranking your leg into flat middle splits.

Picture

Huge thanks to the maker of my flat middle splits, Catie Brier <3 

Active flexibility: This is the ability of the muscle group that is opposite the muscle being stretched (the agonist muscles) to overpower gravity (WITHOUT assistance from an outside source) and move the limb as far as possible into the stretch. An example of this is doing a develope into an arabesque in contortion or dance- your glutes and posterior leg and trunk muscles have to do the work to move your leg into the highest arabesque position possible without assistance from your arms or your instructor.

Picture

Sylphie Ariella: www.sylphieariella.com
End-range control: This is the ability of the muscles surrounding the muscle group being stretched to hold the limb at the end range of motion and do the fine-tuning adjustments that need to occur to either keep the limb at end range, or move it safely from one position to the other.  A great example of this is when you’re working on side-scales. You first start by using your arm to hold your leg as high as possible, then when your leg is as high as it can go, you release your arm. Does your leg drop down a little? This means you may need to work on end-range control of your flexibility.

In my experience both as a circus artist and as a circus PT, we are GREAT at working on passive flexibility. How many times do you get to class and immediately plop down into the splits? We really like passive static stretching—it’s something that is heavily ingrained in performing arts culture. While I don’t think this inherently bad, I think we need to pay equal attention to the other components of flexibility. One of the biggest injury predictors in performing arts is a high ratio of passive-to-active flexibility. If your passive range of motion far exceeds your active range of motion, you are more likely to experience injury at that joint.Whenever I’m working with a patient on improving flexibility, I always address each of these three components.  When assigning corrective exercise programs or functional warm-ups, I usually have at least one exercise for each category, completed in the following order:

  • Cardio. I know, we all hate cardio, but you HAVE to do it. Do some jumping jacks, run around, jump rope, do SOMETHING to get your heart rate elevated for 10 minutes. Yep. 10 minutes. Just do it.
  • Passive stretch. Whenever I do passive stretching, I always integrate a contract-relax component to the stretch. This is a type of proprioceptive neuromuscular facilitation (PNF) in which we can safely “trick” the muscle we’re stretching into stretching a little bit further by first making it contract. For example- If we’re stretching the lats, I will stretch passively for 15 seconds, then contract for 5-8 seconds by pushing your elbows/arms down into the surface you’re stretching them on, then relaxing again for 15 seconds. I do about 4 cycles of this. If you want to read more about the theory of this type of PNF stretching, check out this link: http://www.functionalmovement.com/articles/Screening/2013-07-04_proprioceptive_neuromuscular_facilitation_the_foundation_of_functional_training
  • Active flexibility. After passive stretching comes active stretching. There are a number of different ways to do this, but I like to take the muscle through a full range of motion into end range of motion, usually with resistance via a weight or a theraband. My favorite type of active flexibility exercises not only activate the mover muscles surrounding the stretching muscle, but also your core…the body works as a whole, not as separate pieces, and I like to train active flexibility in this manner.
  • End range control. With end range control exercises, I will typically start by only focusing on activating the antagonist muscles in the last 10-20 degrees of active range of motion of that joint.  This is usually the most difficult component of flexibility, and tends to be incredibly tiring for these muscles. I believe that this is aspect of flexibility training is a KEY component in preventing injuries in performing artists.

Now, lets get specific to stretching the lats. What are the key players involved in improving flexibility and end range control? The muscles that have to do most of the grunt work involved in active flexibility and end range control of the lats are the parascapular muscles and rotator cuff. The parascapular muscles are a group of muscles that attach to your scapula, shoulder, and/or neck and upper back. These are the muscles that need to be strong enough to control all of that range of motion we get from our passive stretching (with or without instructor cranking!) The rotator cuff, as discussed in previous posts, is in charge of the fine movement adjustments that need to occur throughout shoulder range of motion, but especially at end range, to keep the “ball” of the humerus centered in the “socket” of the scapula.

The following three exercises are my favorite starters for safe and effective lat stretching. I like to do these before circus training, in order to properly activate all of the parascapular and rotator cuff muscles before putting them through the rigors of aerial or acrobatic training. I’ll typically also do some passive and PNF stretching after training, as well.

External Rotation-biased Lat Stretch

Picture

This is my favorite lat stretch. The classic lat stretch we see all the time in circus arts- where your hands are on a wall or bench, with your back arched, allows for a lot of compensations that don’t let the lats stretch fully. This stretch also adds in an extra component of external rotation (from the block). This stretches the fibers of the lats that are responsible for internal rotation of the shoulder, which most typical lat stretches skips. Being in a “childs pose” position doesn’t let you substitute by arching your back.

  • Start in childs pose with elbows shoulder width apart on the bench, and yoga block in hands. Let chest sink, hold 10-15 seconds
  • PNF contract-relax: gently push your elbows down into the bench while squeezing the ball/block. Hold for 8-10 seconds, then relax and stretch slightly further.
  • Focus on keeping your ribs in during this whole stretch. If you let your ribs splay out, you’re allowing spinal extension, which is one of the most common compensations during lat stretching, and significantly decreases the effectiveness of this exercise.
  • You should feel this stretch in your LATS (shocking, I know). If you feel a pinching sensation in the front of your shoulders, back off the stretch and widen your elbows.  If it persists, STOP.

Modified Dead Bug for Active Shoulder Flexibility

Picture

This is my favorite starter exercise to encourage parascapular muscle activation and active control of lat flexibility. It also is a GREAT core exercise, if done right!

  • Start with a theraband or tubing around stall bars (or similar). Hold ends of the theraband with your thumbs pointing up
  • First, engage your abs and focus on keeping your ribs in for the whole exercise. Bring arms overhead, while you simultaneously lower one leg
  • Bring arms only as far overhead as you can WHILE KEEPING YOUR LOW BACK FLAT ON THE FLOOR. This exercise is pointless if you bring your arms all the way overhead but your back is arched. Return to start position, switch legs.
  • You absolutely MUST breathe during this exercise. If you hold your breath, you substitute by using your diaphragm instead of your abs for the core strength component.
  • Keep your ribs in and your low back FLAT on the mat the whole time. The second you start to arch your back, it is no longer an active lat stretch.
  • With this exercise, since this activates muscles that should be “on” to some extent the whole time you do any upper body activities, I do two to three sets to fatigue.

Child’s Pose Shoulder Elevation for End-Range Control

Picture

This is a great exercise to focus on activating your rotator cuff and scapular muscles during overhead, end-range activities. It looks easy, but is deceptively difficult!

  • Start in childs pose with your thumbs up.
  • With one arm, first engage shoulder elevators by shrugging your shoulder up slightly. From here, lift your arm up as far off the floor as you can.  It may not be very far, but thats ok!
  • Focus on engaging the muscles around your shoulder blade to start to maintain end range position
  • Hold this end range position for 5-10 seconds, then switch. This should also be done 2-3 times to fatigue.
These three exercises are a great start to SAFELY improving your lat flexibility, and would be a good addition to your current warm up.  Be sure to measure your progress, too! Take a “before” photo using the measurement method I wrote about in the last post, then see how you improve in the next few weeks! But as always, LISTEN TO YOUR BODY! If one of these exercises doesn’t feel right, don’t do it…if you have shoulder pain, go see a physio- you don’t need to live with pain!
Jennifer Crane, PT, DPT, OCS, ATC
Doctor of Physical Therapy
Board Certified Orthopaedic Specialist
Certified Athletic Trainer