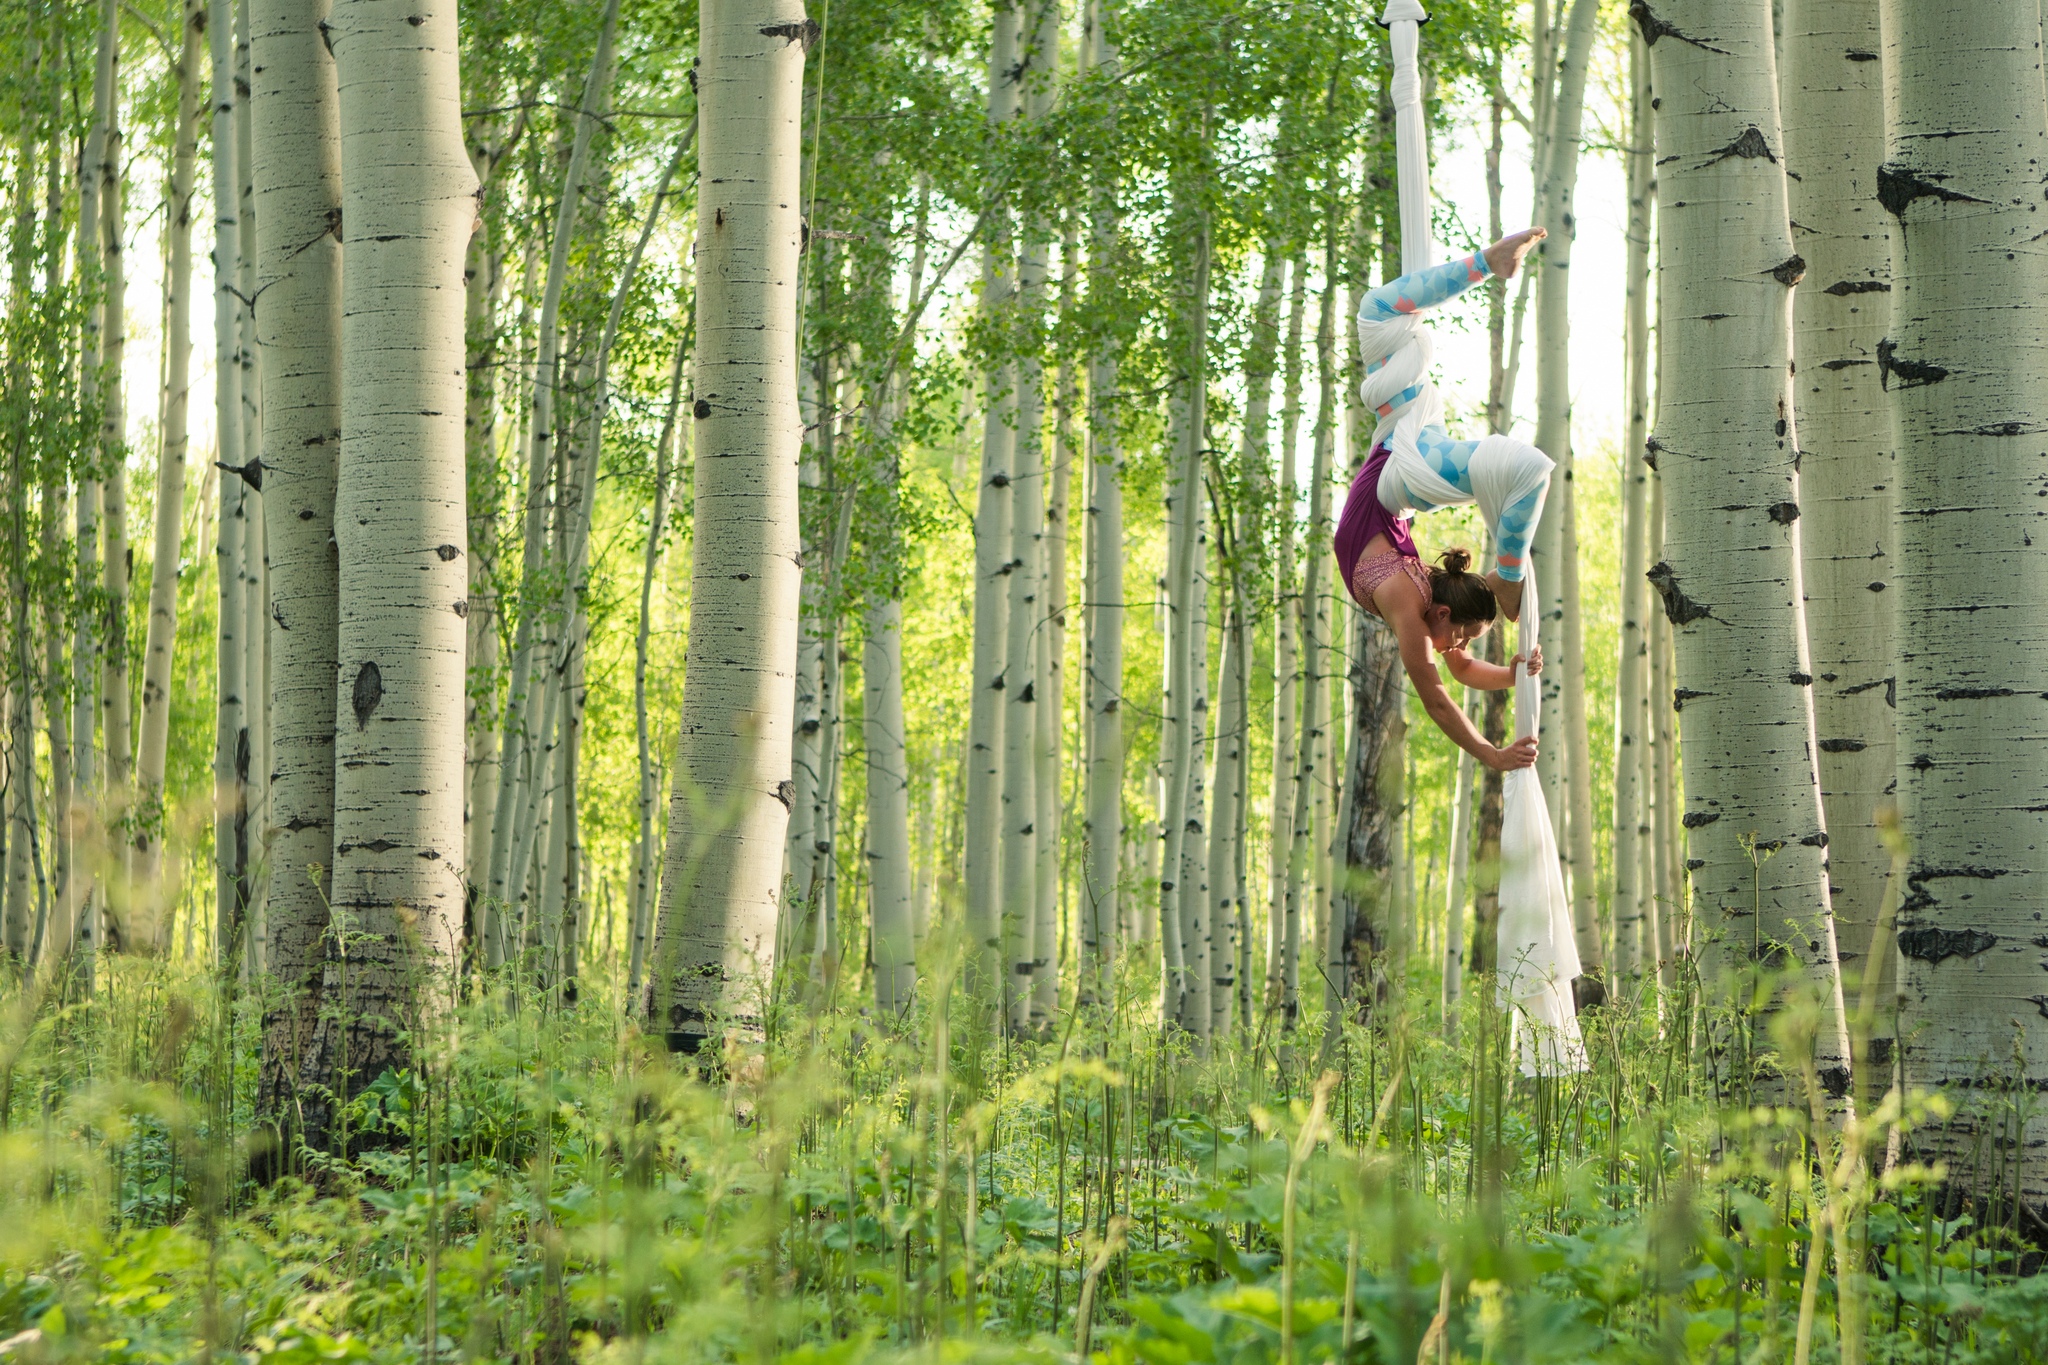
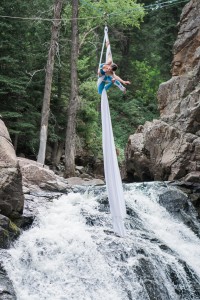
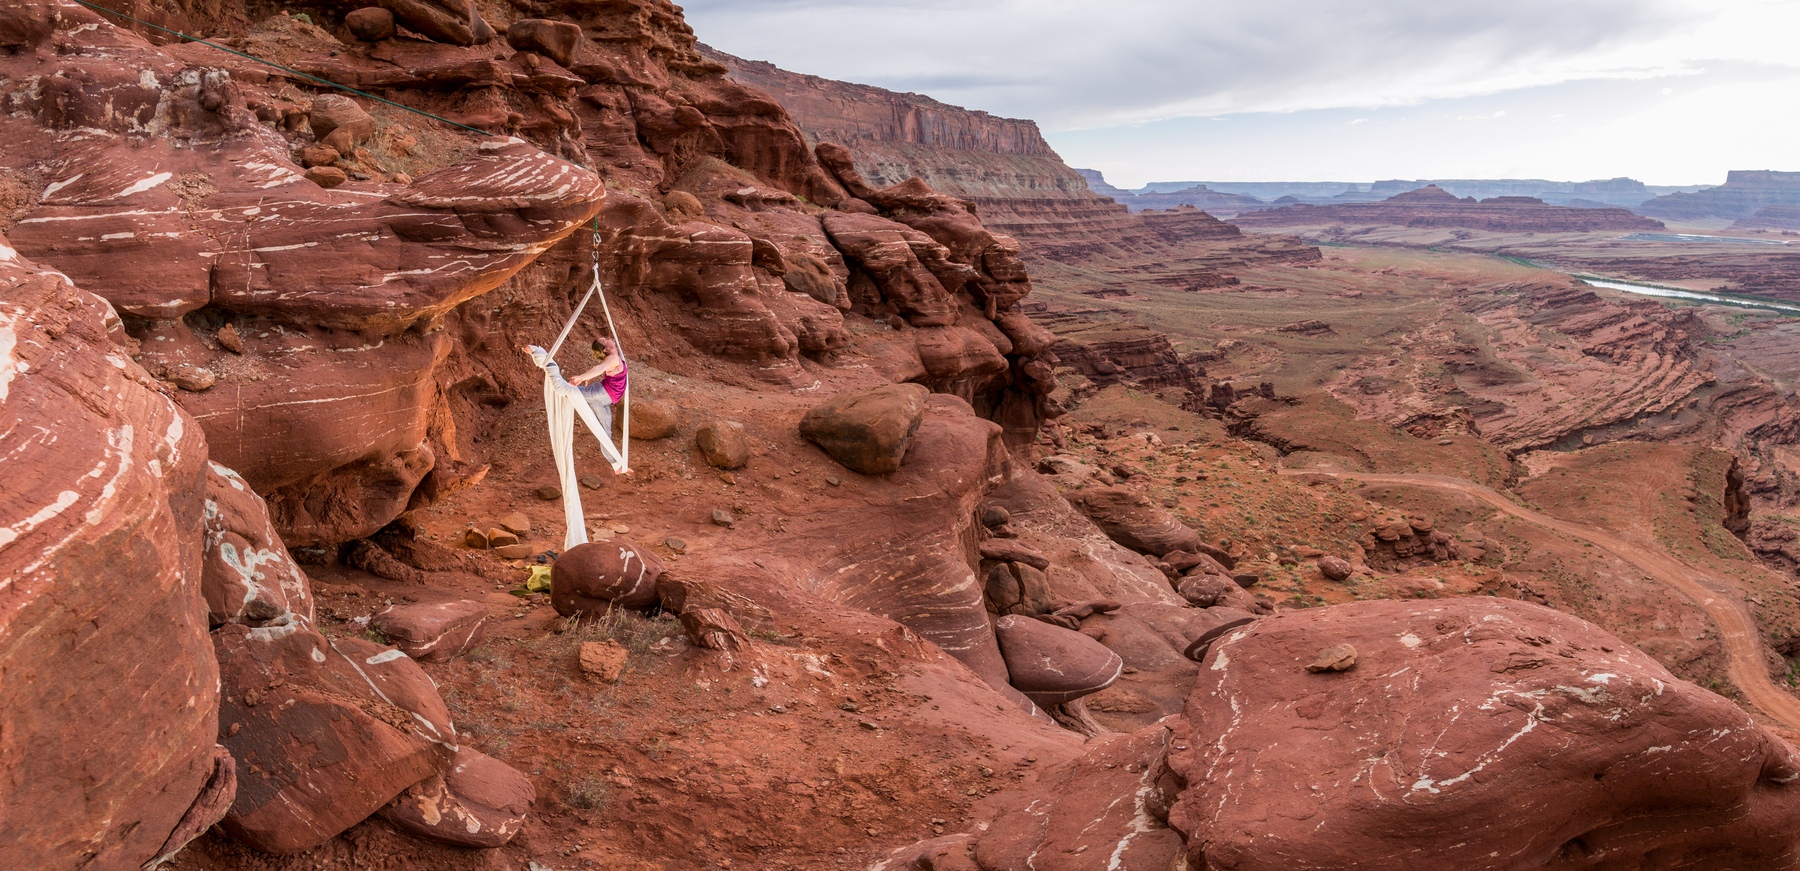
You’re performance ready, but are you photoshoot ready?
A performance usually lasts 3-5 minutes, but a photoshoot lasts at least a half hour (usually more). A performance is about flow, movement, and suspense. A photoshoot is about accentuating body lines and capturing the feeling of the movement. Here are some tips to help you be as prepared as possible:
1. Pick your poses wisely.
This isn’t about showing off every move you’ve ever learned, so be picky.
Choose poses that photograph well. Not all poses do. You and other aerialists know how difficult certain poses are to get into, and how much strength some require. Assume that most people looking at your photos don’t. Before you choose an advanced move to showcase, ask yourself if it shows the lines of your body well. The answer may be no because of the nature of the pose or because it doesn’t show your particular flexibility or strength well (which can change over time). Which brings me to the second part of choosing your poses.
Choose the poses that will really show your best flexibility and strength. For me, this means showing off my back flexibility, but not focusing on splits and straddles. For many of my friends, it’s the opposite – great splits, not so great back bend. Of course you can throw in one or two of your not-best poses in order to be able to compare it to future photos and see your progress, but it shouldn’t be your focus for the shoot.
Choose poses that allow you to conserve energy. Because a photoshoot lasts a lot longer than a performance, it is in your best interest to choose poses from which you can easily transition into a good rest position. There will be times that your photographer wants you to keep the same pose, but they want to change angles, adjust lighting, or switch lenses. This may take a minute – or ten minutes – so you need to be able to rest. In a studio, you might decide just to come down to the ground during these times, so the pose must not take up all of your energy to get into.
The other side of saving your energy is simply planning an array of poses that doesn’t target the same muscle set. For example, if you can’t hold yourself up by your arms for a half hour straight, then don’t choose all poses that require a lot of arm strength. Instead, stagger them so that an arm-heavy pose is followed by a core strength pose, followed by a hang, and so on.
2. Pick your costume wisely.
Looking your best in photos is also somewhat determined by your wardrobe. Instead of simply picking your favorite workout outfit or costume, consider your location and apparatus, and choose what will stand out from those.
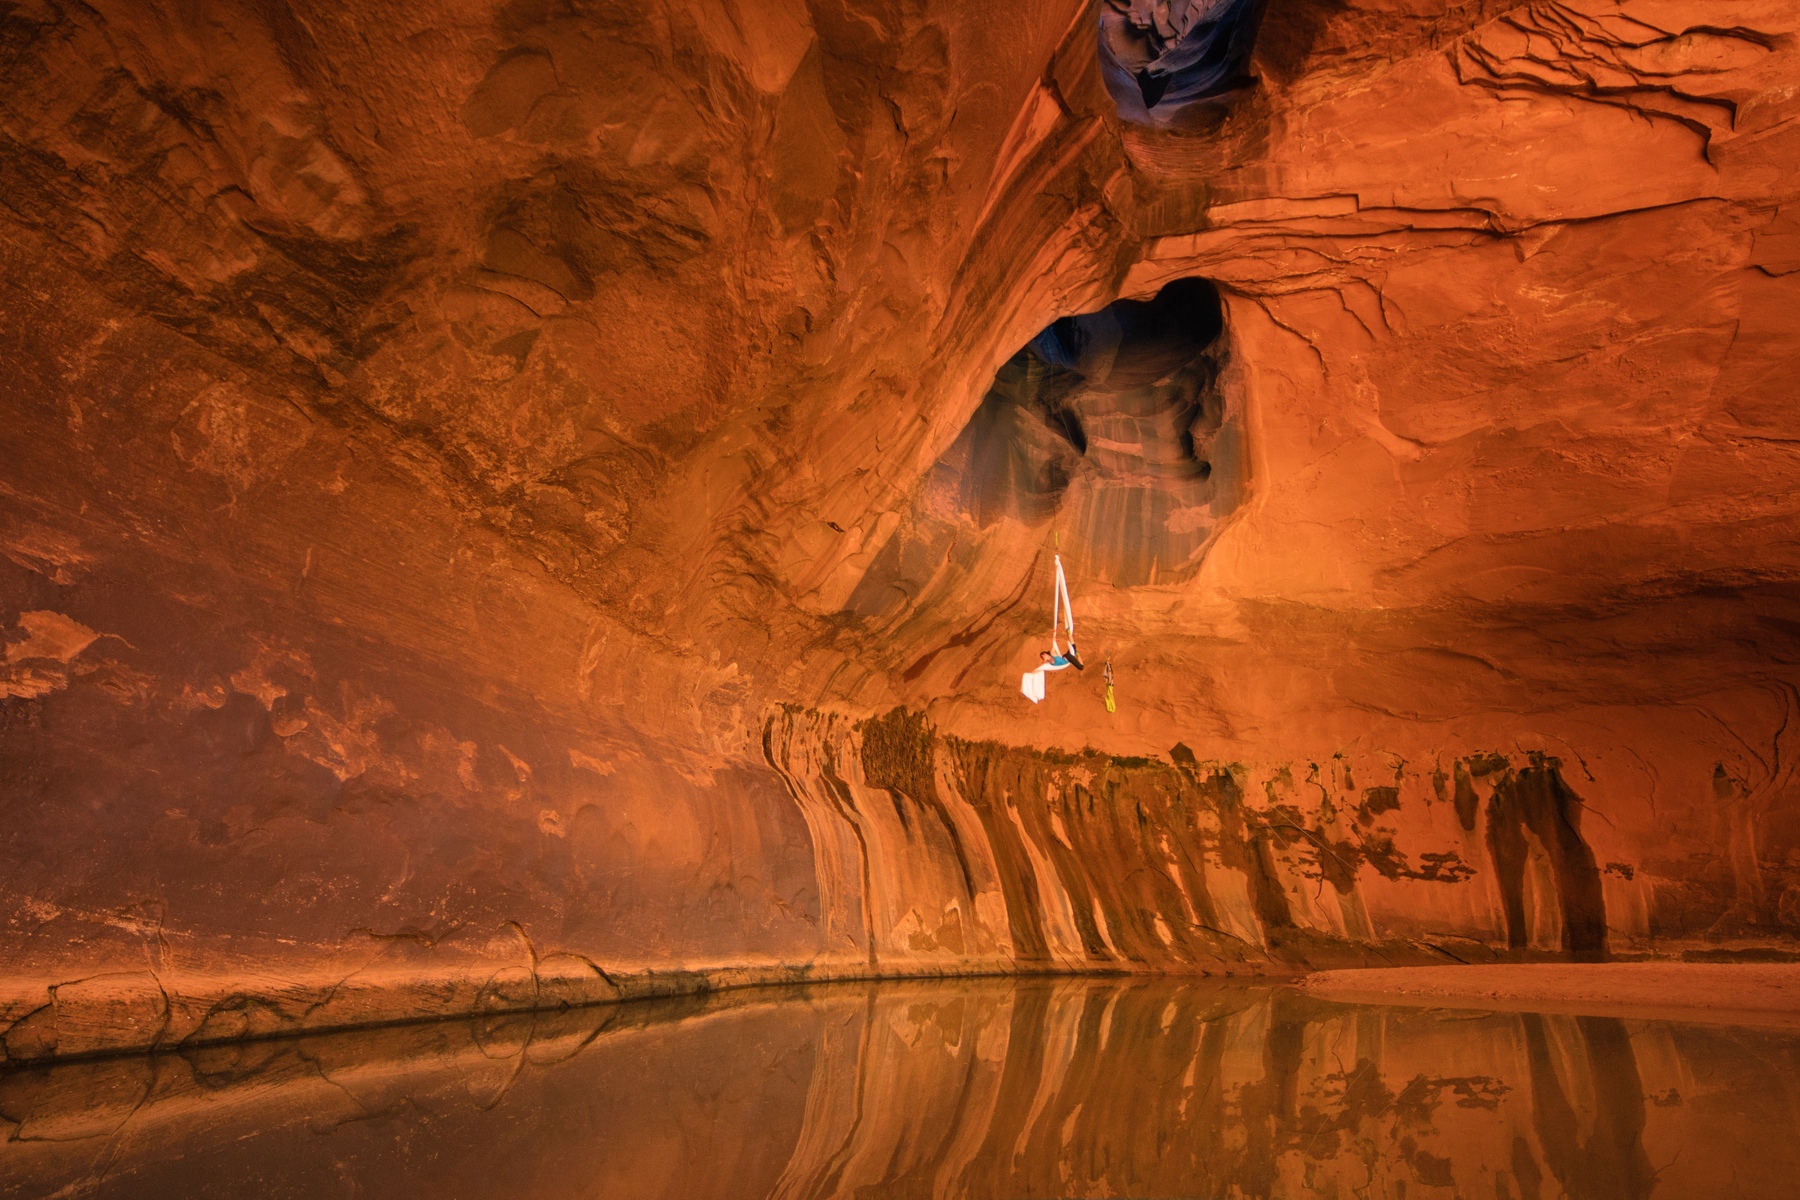
Choose the right color. If you wear too much black, you will often blend into at least part of the background, making it difficult to see your body lines. Intricate patterns also sometimes get lost in the background or make it difficult to see your body lines. If you wear the same color as your apparatus, (white on white as I most often see), then your body lines will again be difficult to see as it’s hard to differentiate between you and the apparatus. Bright colors are always a good idea. Which specific colors depends on your personal style, and the feeling you want to evoke in the photoshoot.
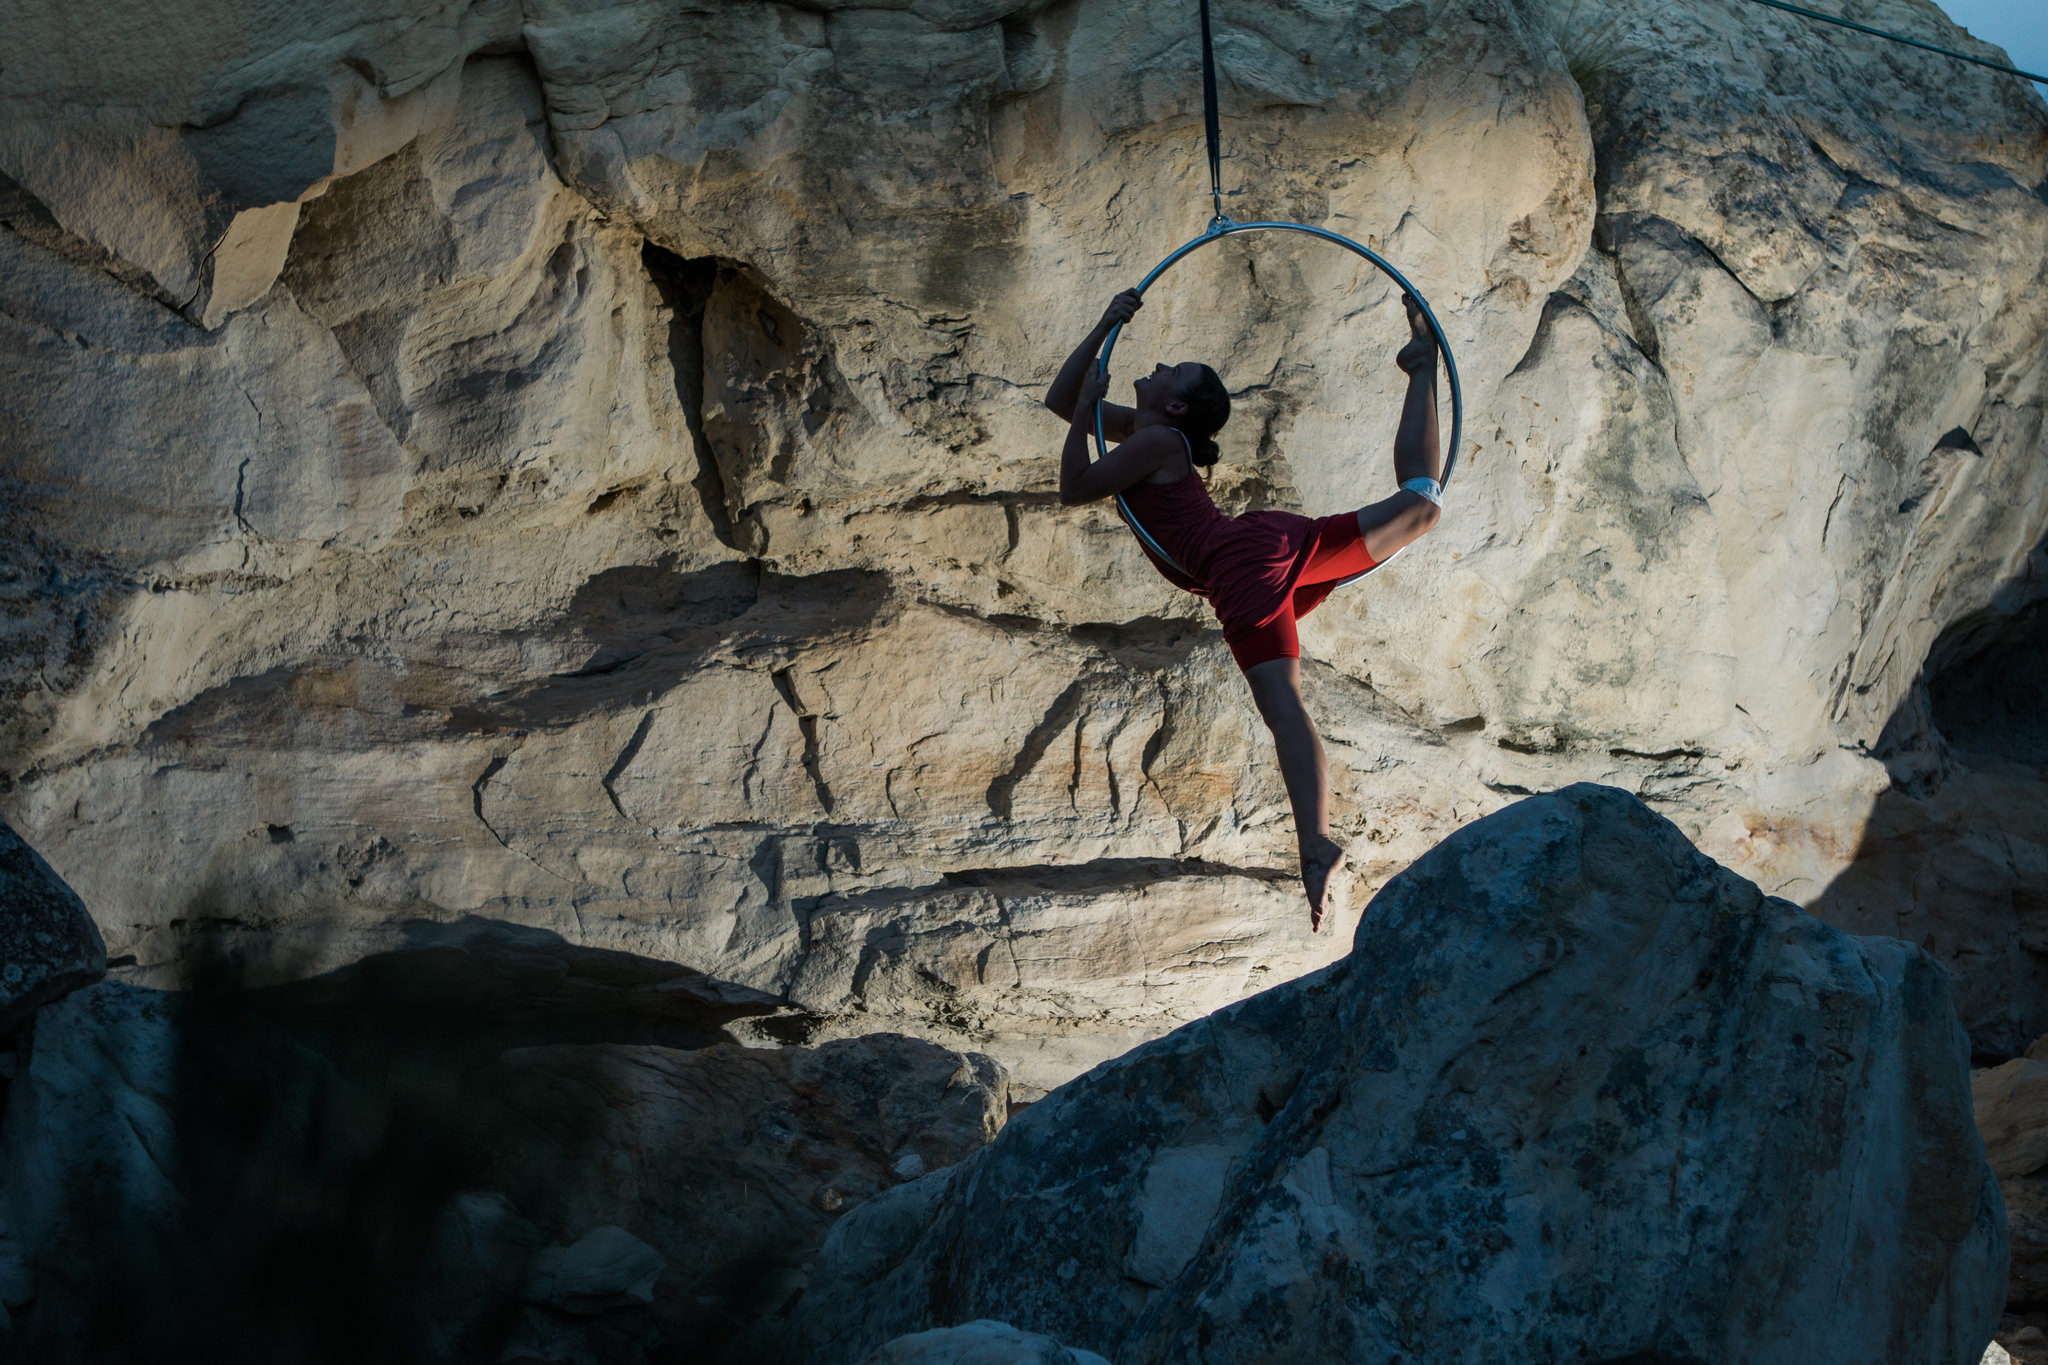
Choose for your purpose and your body. If your photoshoot is for advertising an upcoming show, then use your show costume or something that fits into the style of the show. Likewise, you can do a themed photoshoot based around a certain idea, using your costume, location, and possibly props to add to the theme – as long as these don’t make it difficult for you to move safely and effectively.
For portfolio photoshoots that are meant to simply showcase your work, dress to impress your clientele: if you do a variety of show types, either bring more than one costume or use a fairly conservative outfit that is unlikely to have malfunctions. I’ve made the mistakes of picking clothing that moved when I came upside down, and a top that the “ladies” came out of after 20 minutes in the silk (luckily my husband is my photographer, so no harm done!).
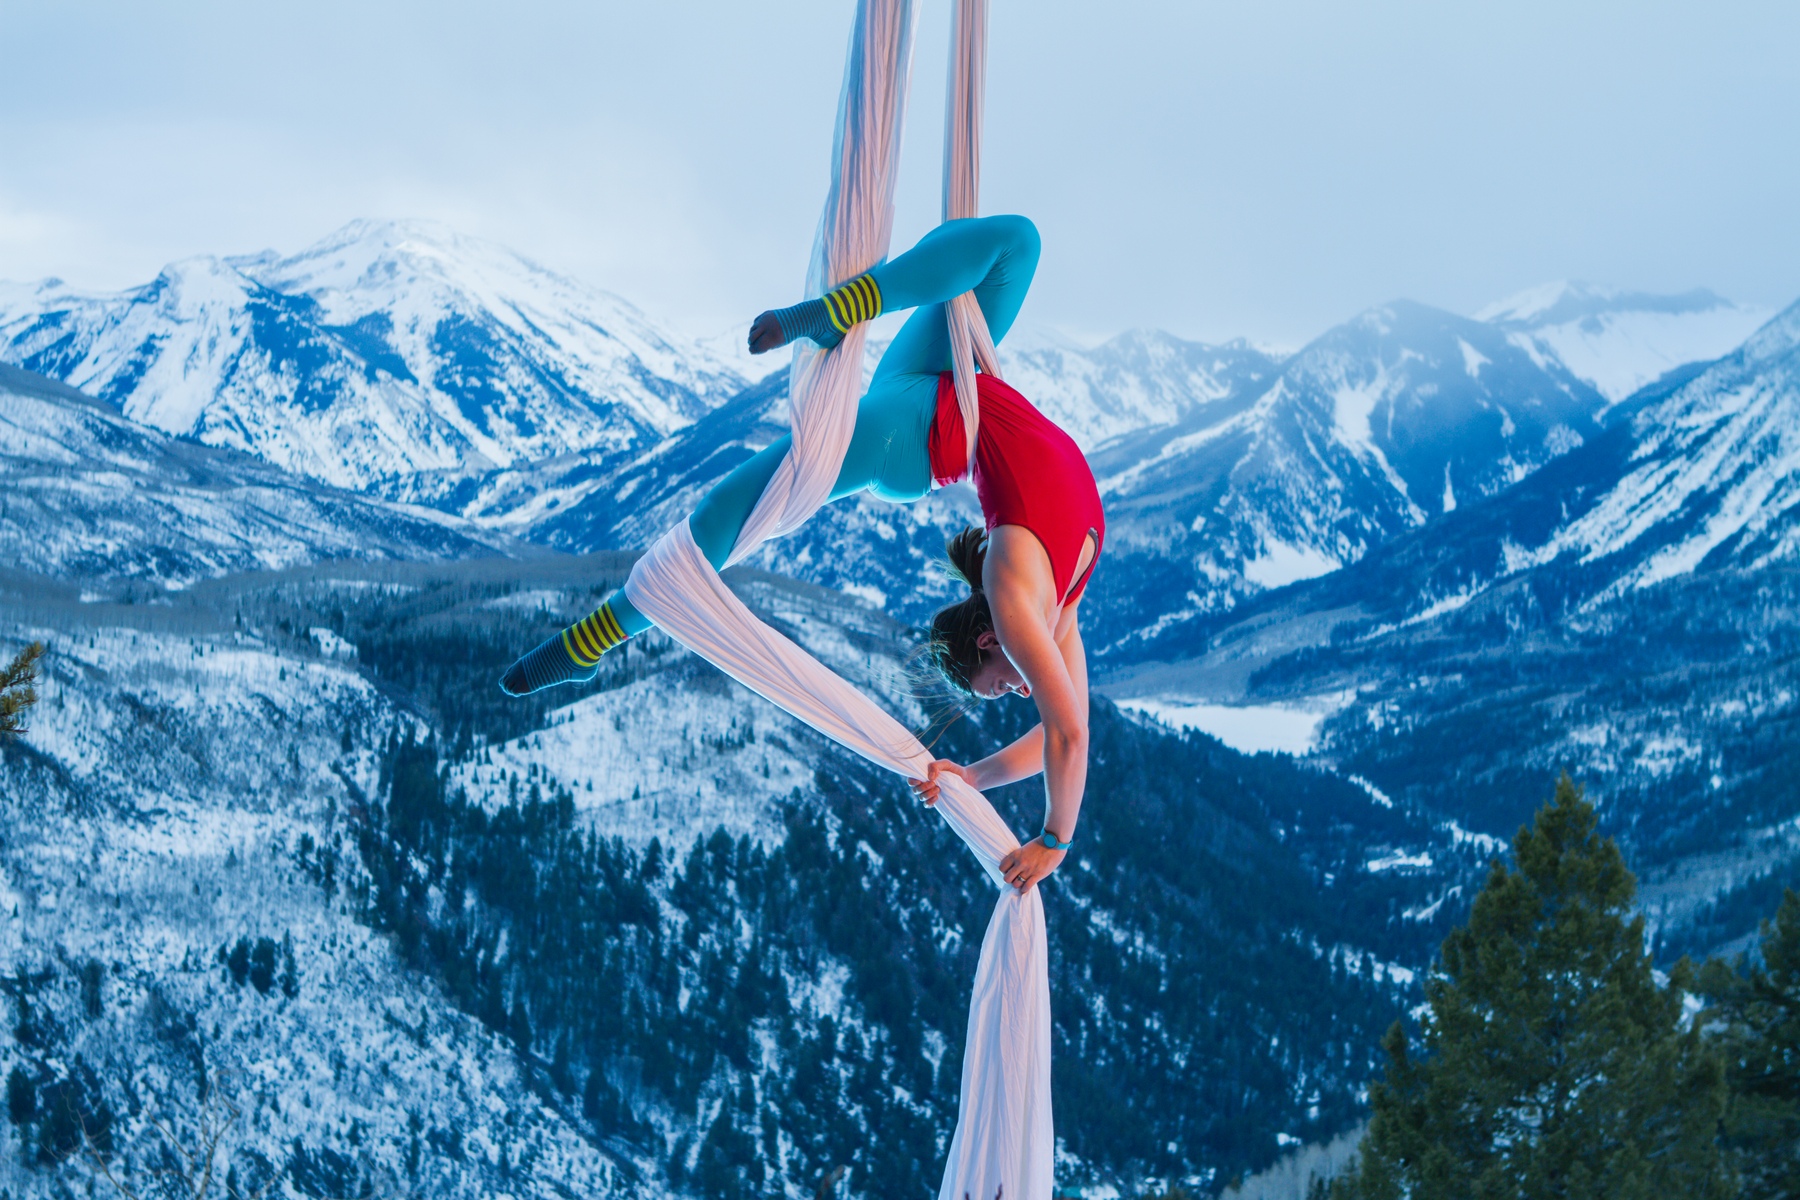
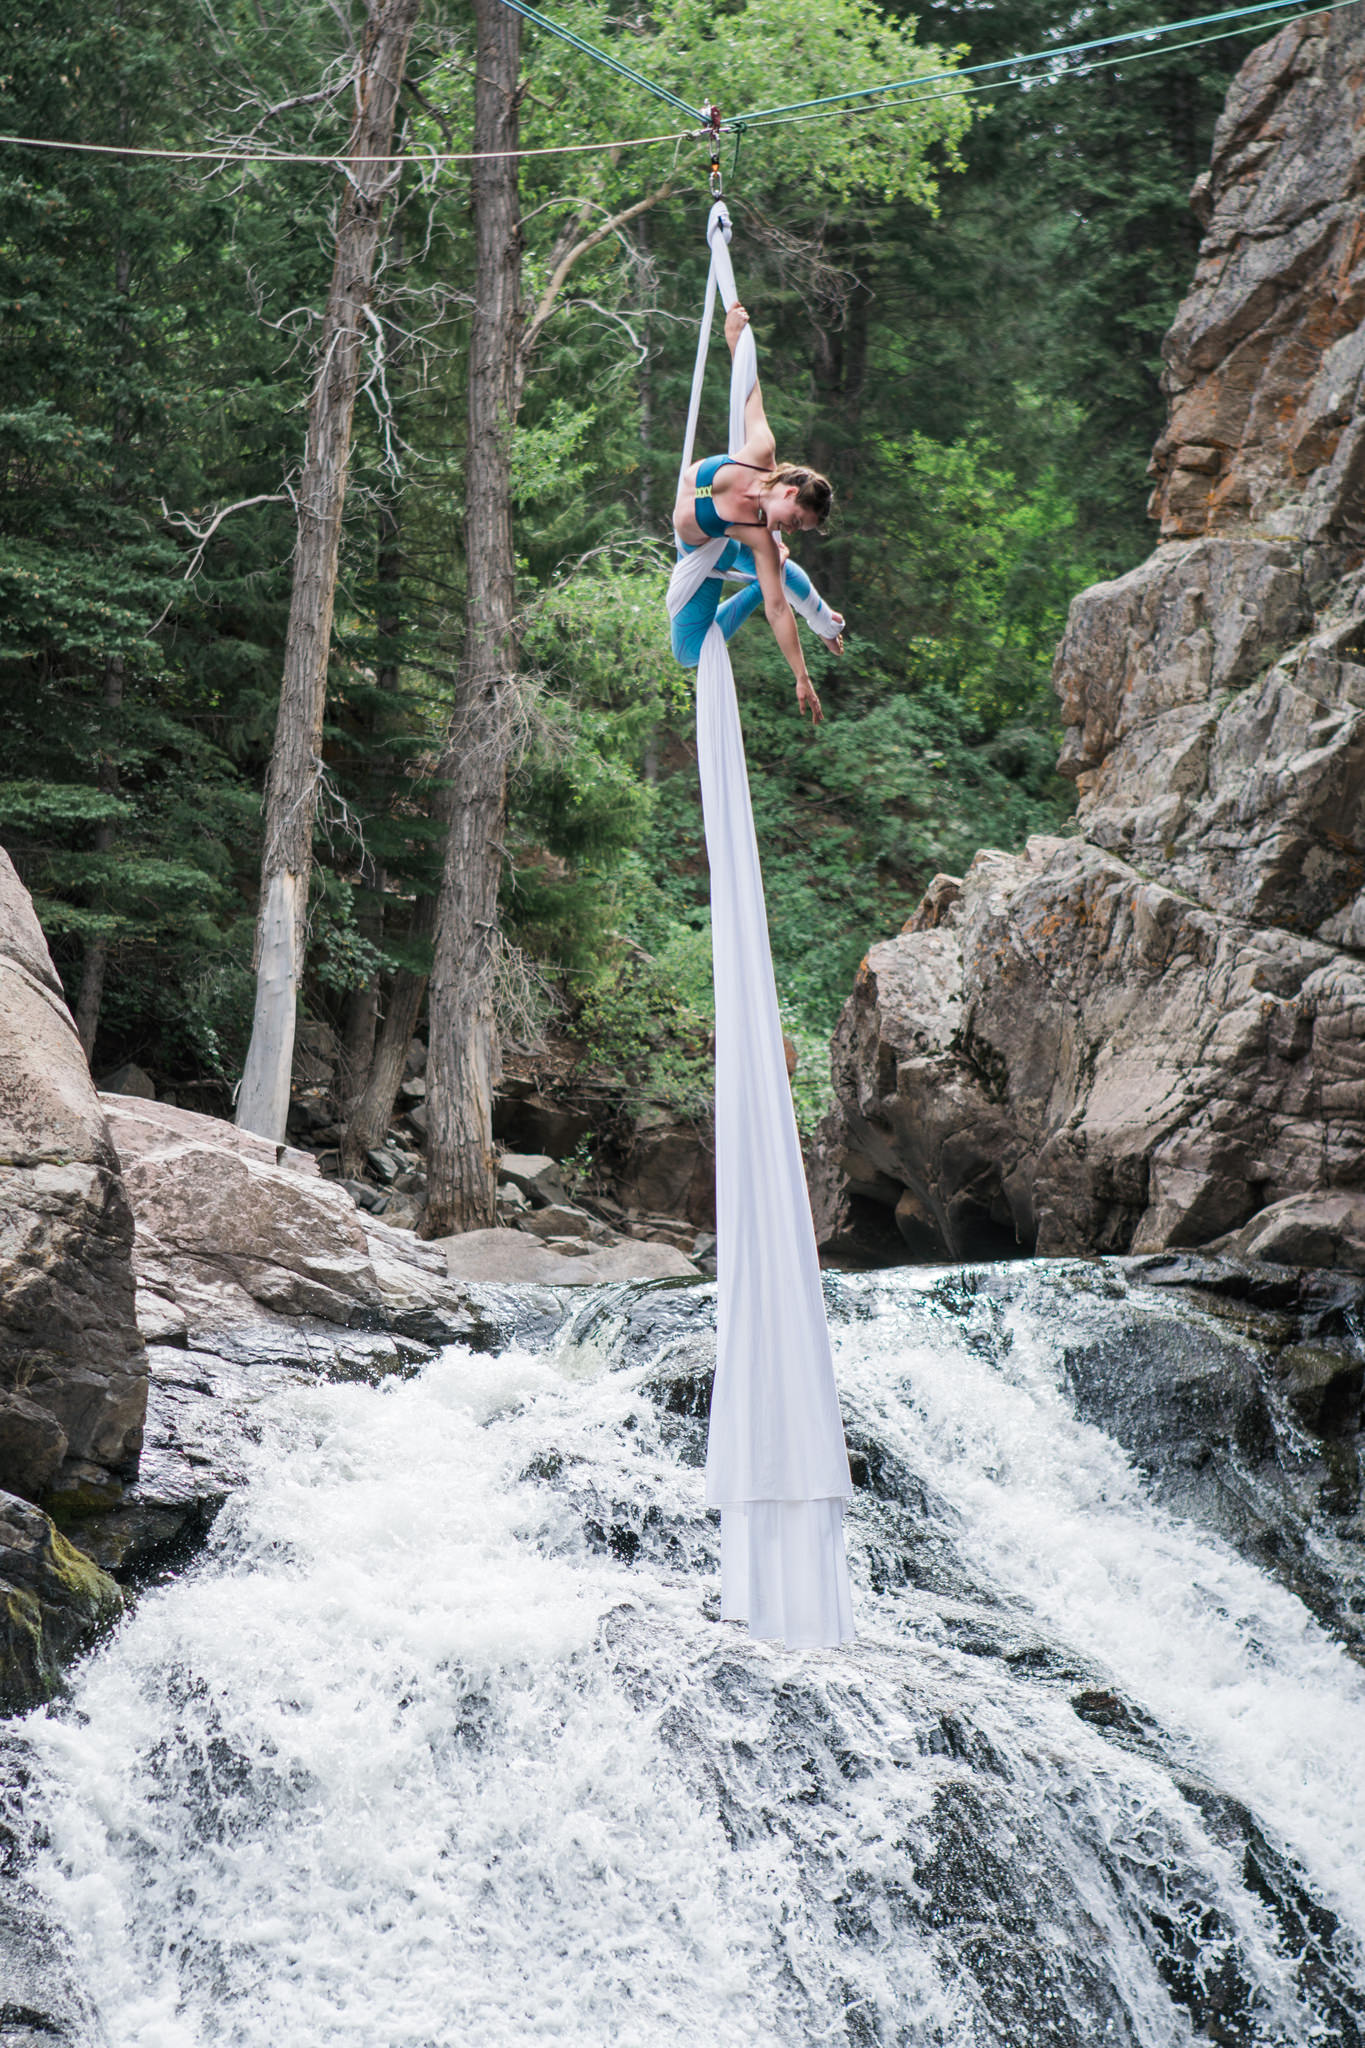
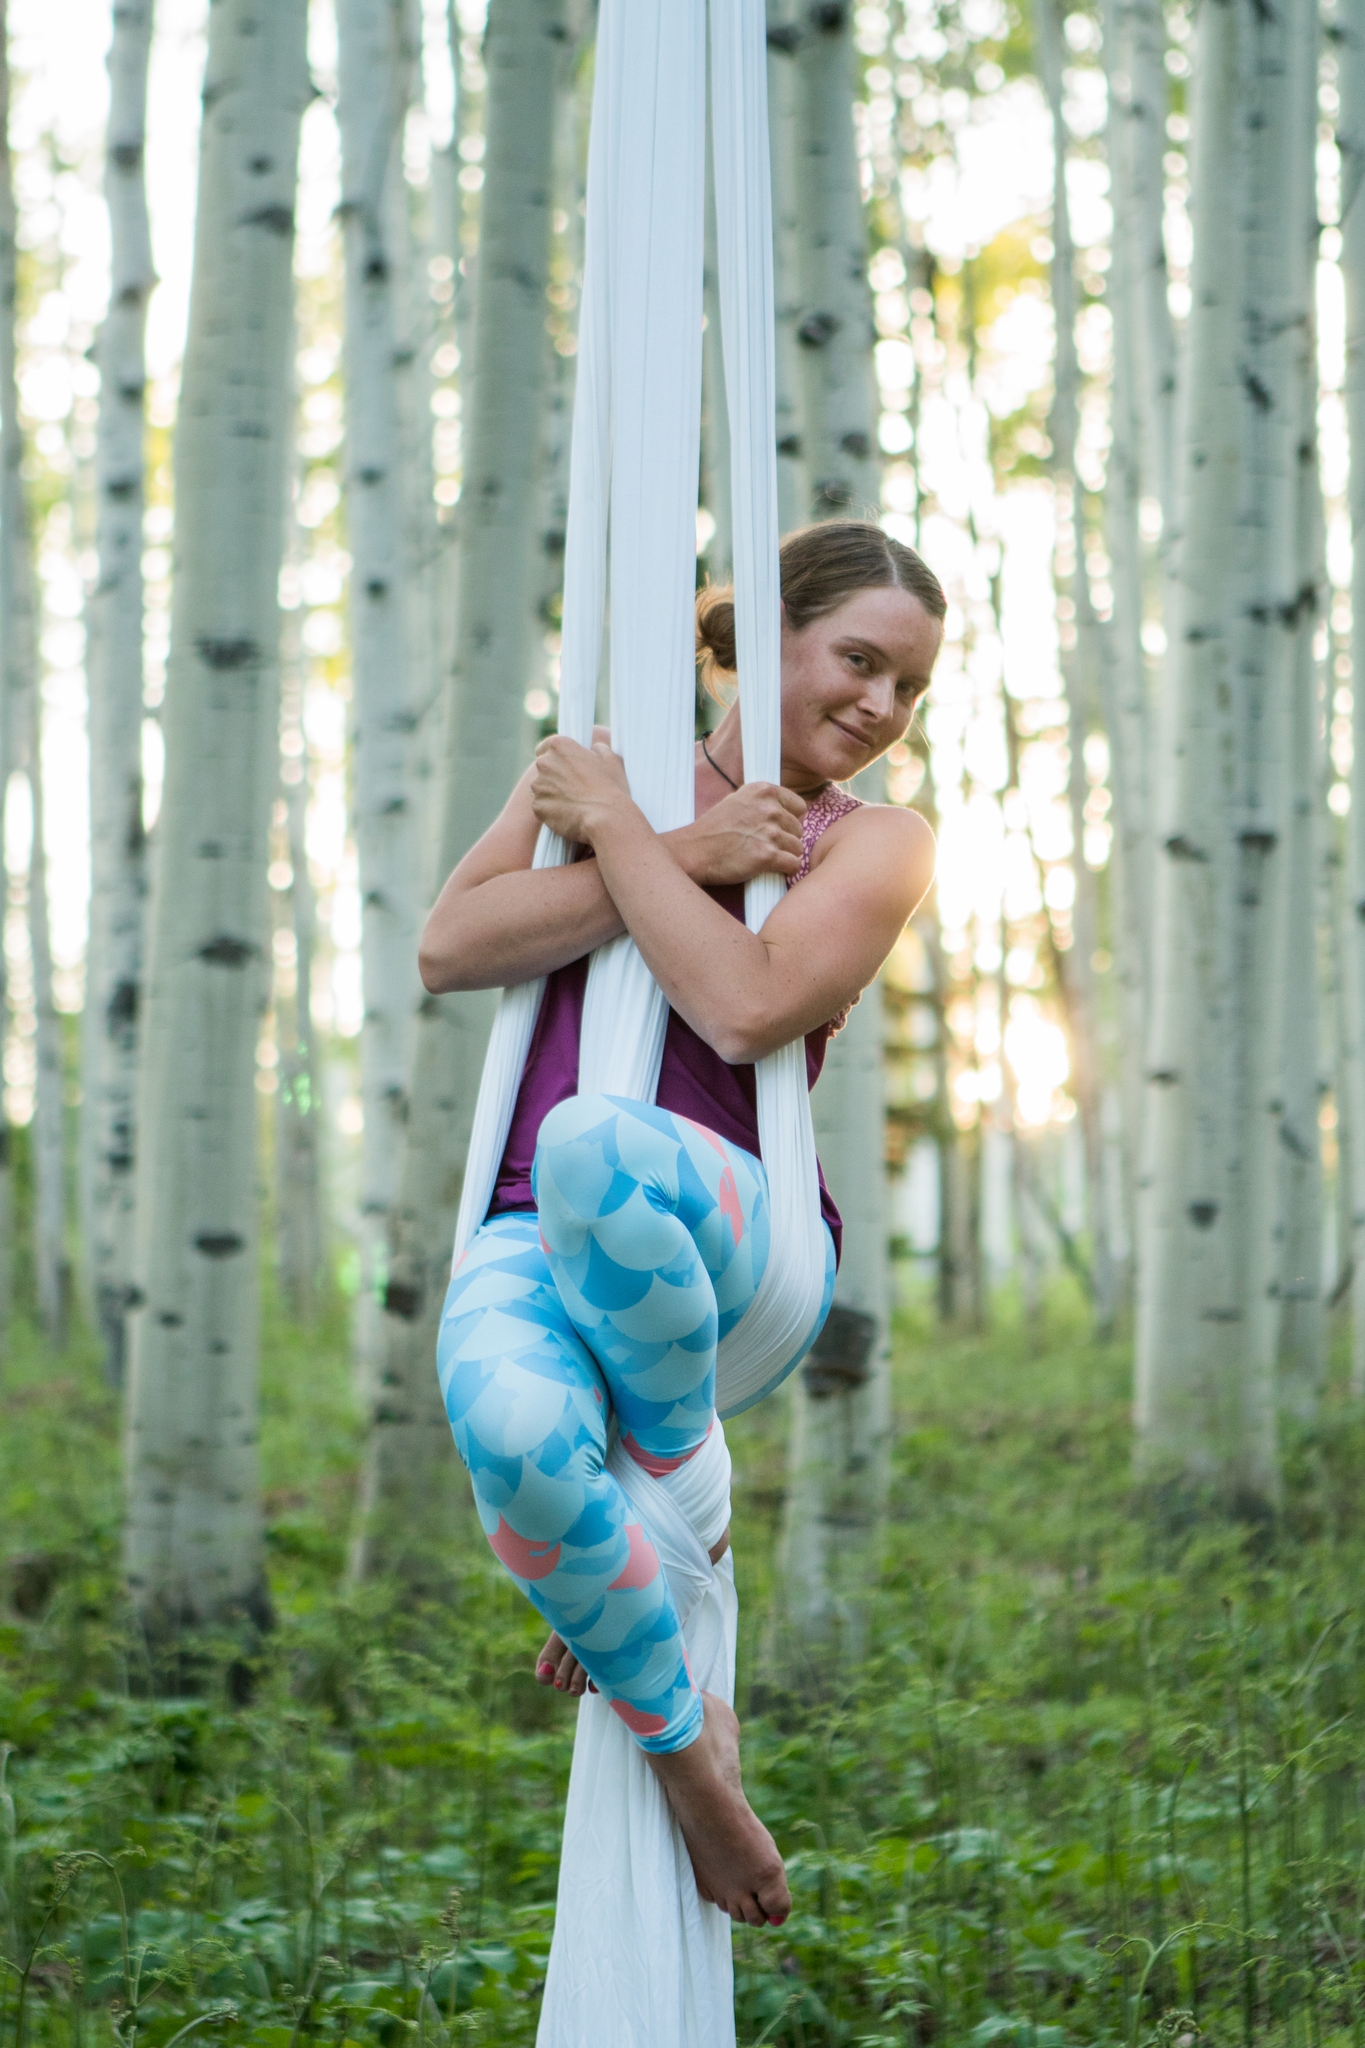
Solid colors and vertical lines add to the appearance of a long body. Likewise, leggings and catsuits make your legs look longer than they will look in shorts or briefs. Horizontal lines and too many breaks in your outfit will make you look shorter and wider. You can definitely still choose some fun elements to your outfit, but try to choose ones that are flattering and don’t get in the way of your movement.
3. Think about extension and feeling.
The same passion and feeling that shows in your performances should show in your photos. Even though you don’t have the flow of movement to convey your message, you can still convey emotion through facial expression and lines of the body. This concept is the same for aerialists and ground dancers alike.
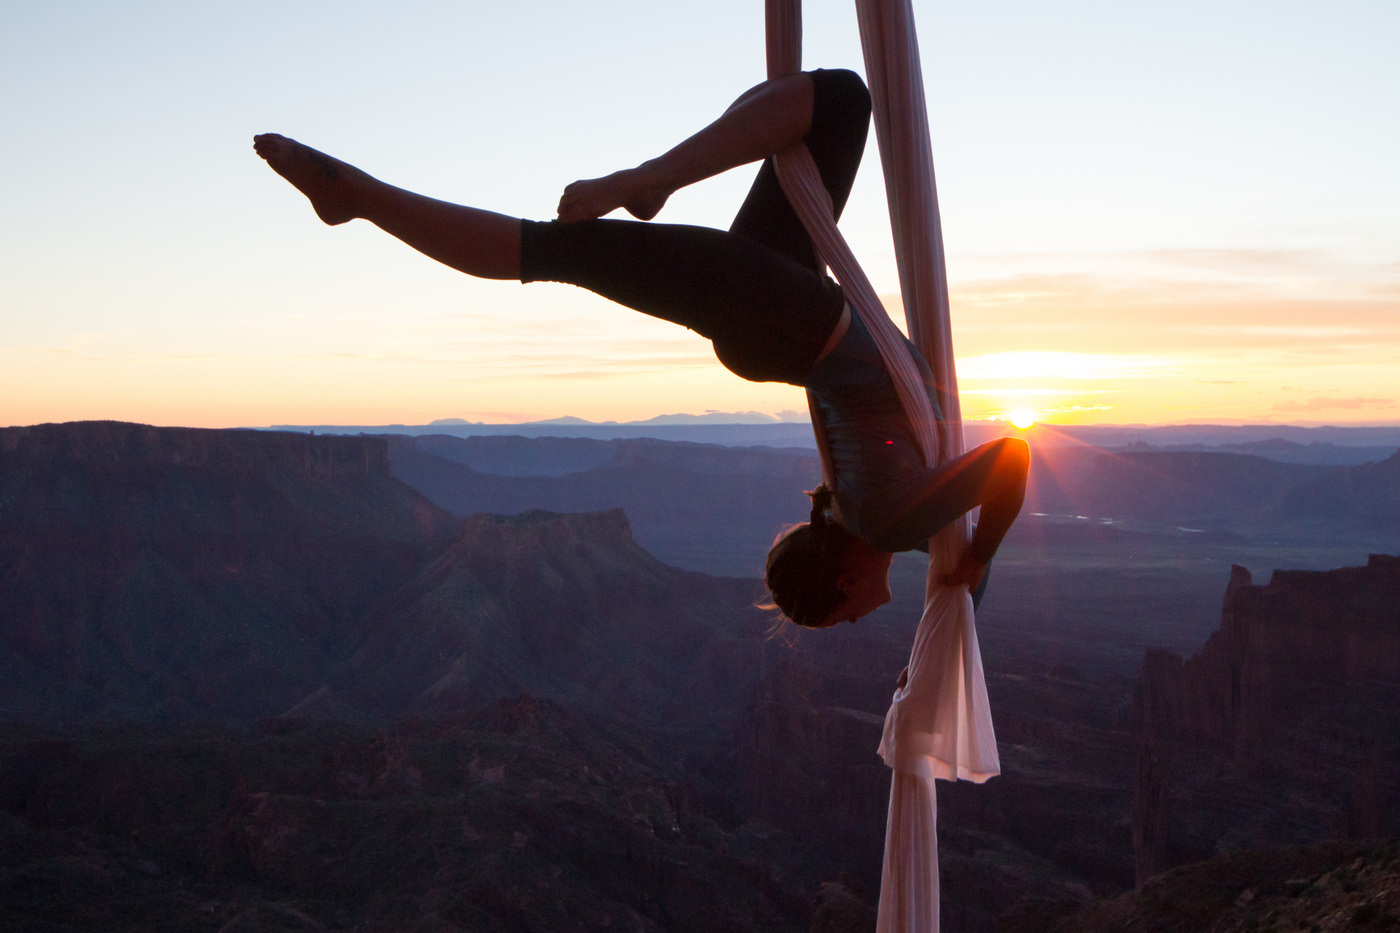
Point eyes and hands with purpose. The most telling part of your body is your eyes. This doesn’t change in photos, even when you can’t clearly see your eyes in the photo. That’s because where your eyes look, your head follows, and your head position changes the position of your body. Generally, if you have one arm extended, look toward your extended hand for the most feeling. Both your hand and your eyes should either point out from your body line or in line with the apparatus (especially with vertical apparatuses such as silks). Below is an example from one of our recent photoshoots. Notice the feeling you get from the photo on the left versus the right, though they are technically the same pose.

When you have both arms wrapped or in use in the apparatus, look along the lines of your apparatus (up or down, whichever’s most natural in that position), or wherever keeps your head in “neutral position” in line with your body, neck elongated. You can still look toward your hands in most positions.
When both arms are free from your apparatus, they should contribute to the feeling of movement either by extending back in line with your body or above your head into a natural, slightly bent position such as ballet’s “fifth position.” Of course you aren’t limited to these, but take cues from ballet and other dance forms for arm and hand placement. When both arms are out, your eyes no longer follow your arms, but instead your head maintains a “neutral position.” First photo below shows me (Kaydee Barker) in extension, second is of the stunning
Jocelynn Rudig at a recent festival in my hometown of Steamboat Springs.
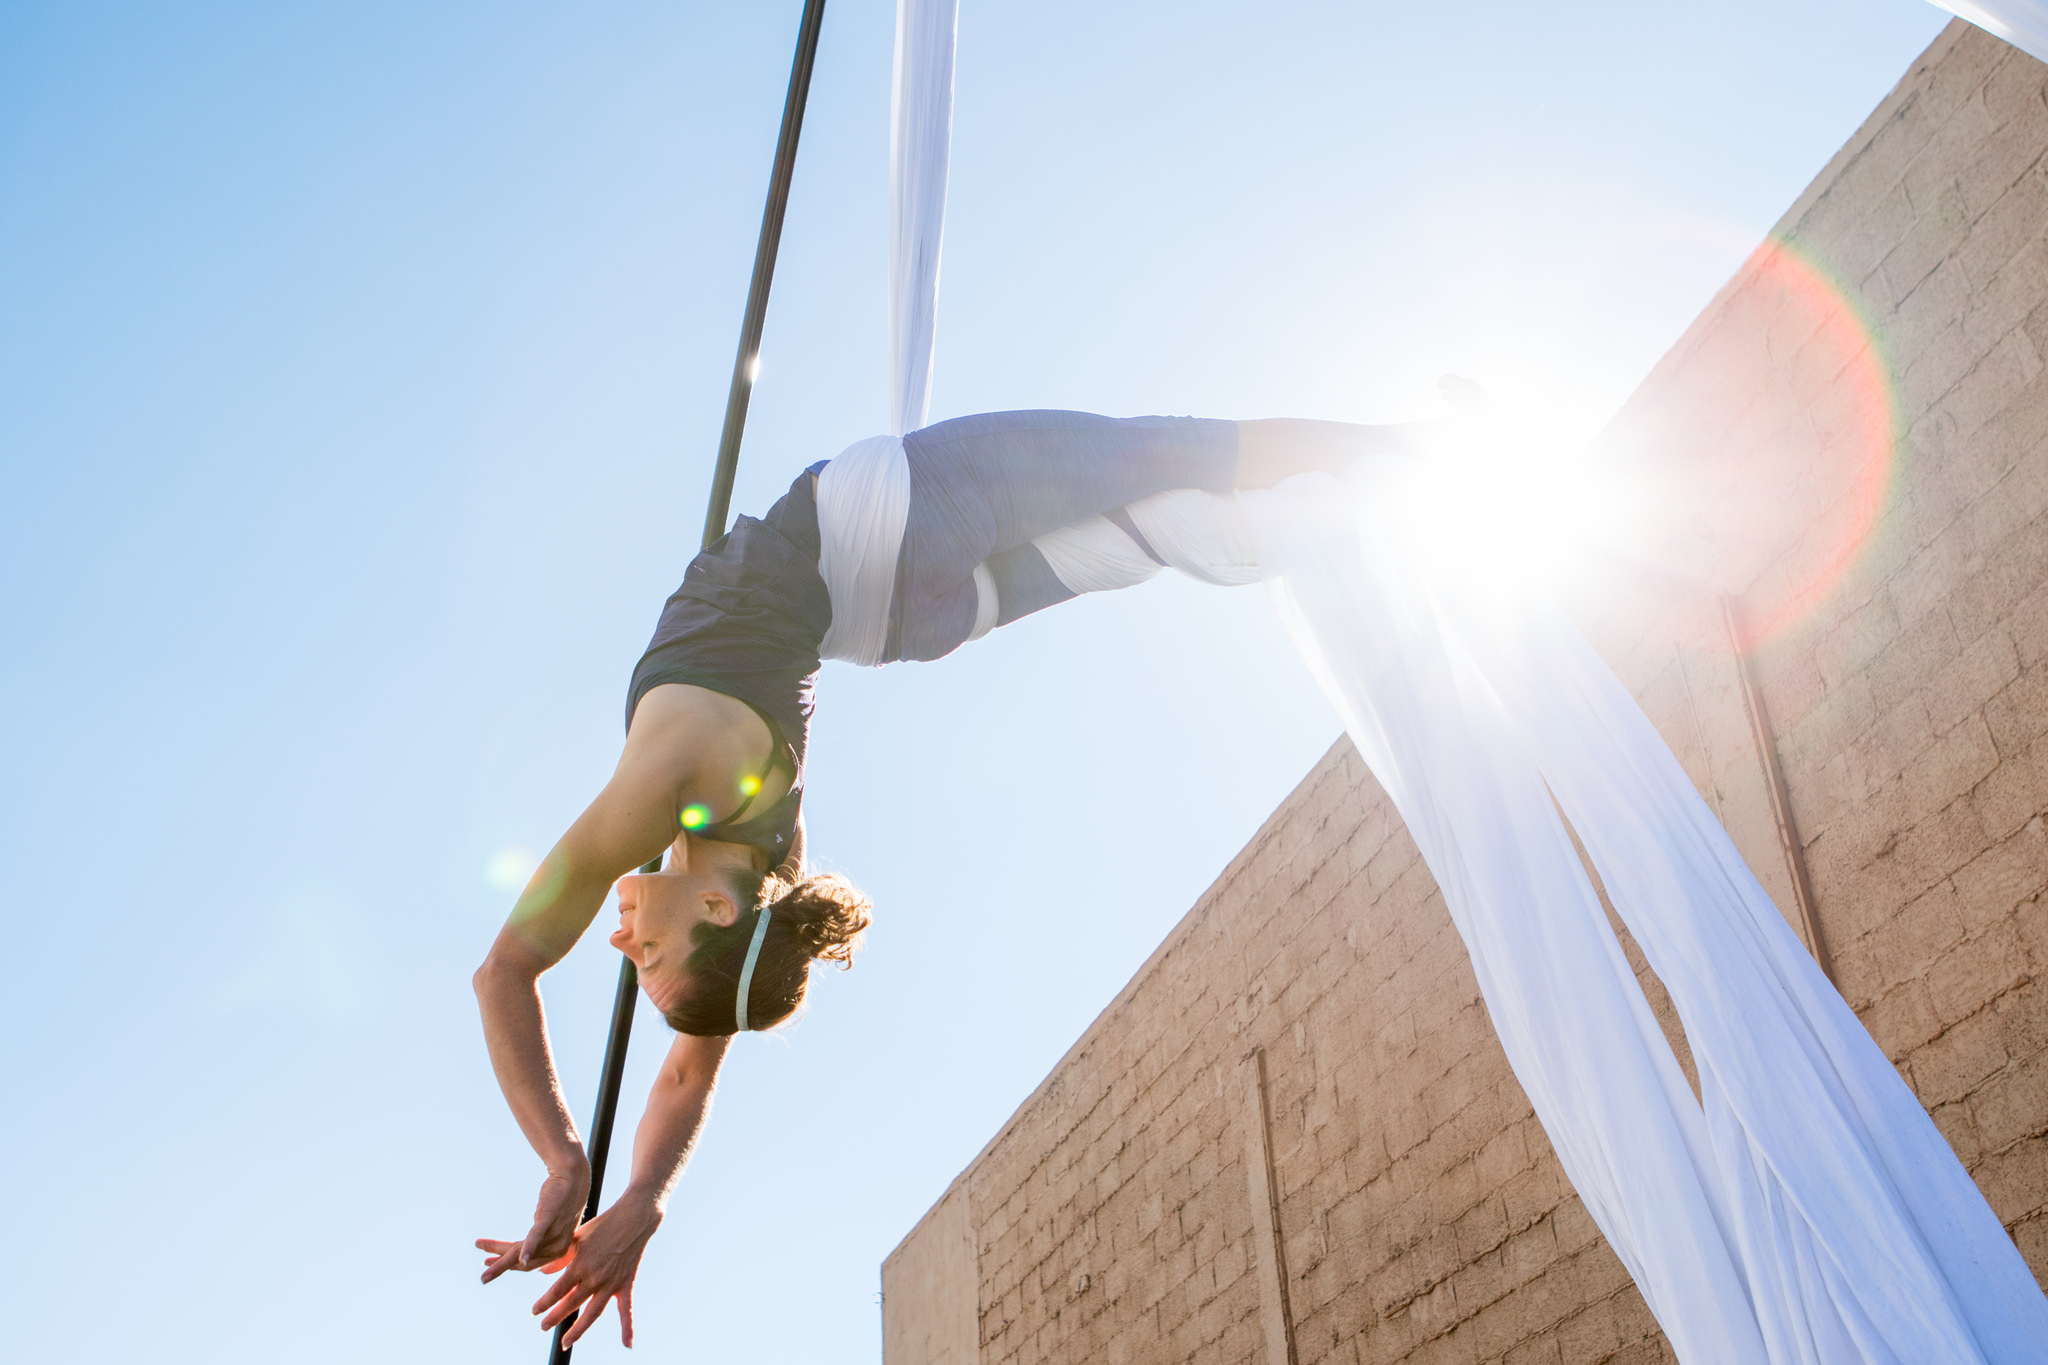
Find your full extension in the pose. Extension is important in evoking feeling as well as showing off body lines. Often, you want to lengthen every part of your body. Extend your arms, your neck, and your legs, and engage your core. Ask your photographer to tell you when your body isn’t straight in poses like plank and mermaid, or when your straight leg isn’t extended all the way in poses like gazelle.
Closing notes:
Show up well fed, warmed up, and ready to have some fun! To help you get into the right mindset, consider bringing a playlist with some of your favorite songs to play to. Your preparedness and most of all, your joy, will show up in photos. Have fun!
About the Author:

Kaydee Barker and her husband Devon Barker (the photographer of all the photographs in this article) travel around the United States and abroad connecting the beauty of the great outdoors with the beauty of the human spirit, as shown through aerial dance. This began as a project they called the “Aerialist in the Wild” project, but grew into a lifestyle, and a lifework of inspiring people – starting with Kaydee herself – to connect with nature and learn to love themselves.


 Kaydee Barker and her husband Devon Barker (the photographer of all the photographs in this article) travel around the United States and abroad connecting the beauty of the great outdoors with the beauty of the human spirit, as shown through aerial dance. This began as a project they called the “Aerialist in the Wild” project, but grew into a lifestyle, and a lifework of inspiring people – starting with Kaydee herself – to connect with nature and learn to love themselves.