Here’s my favorite Christmas craft idea spotted this season: Making aerial apparatus ornaments. This great tree ornament idea comes from Jordan Anderson and Clayton Woodson of Aerial Fit at Circus Building.
Make a Fabric Ornament
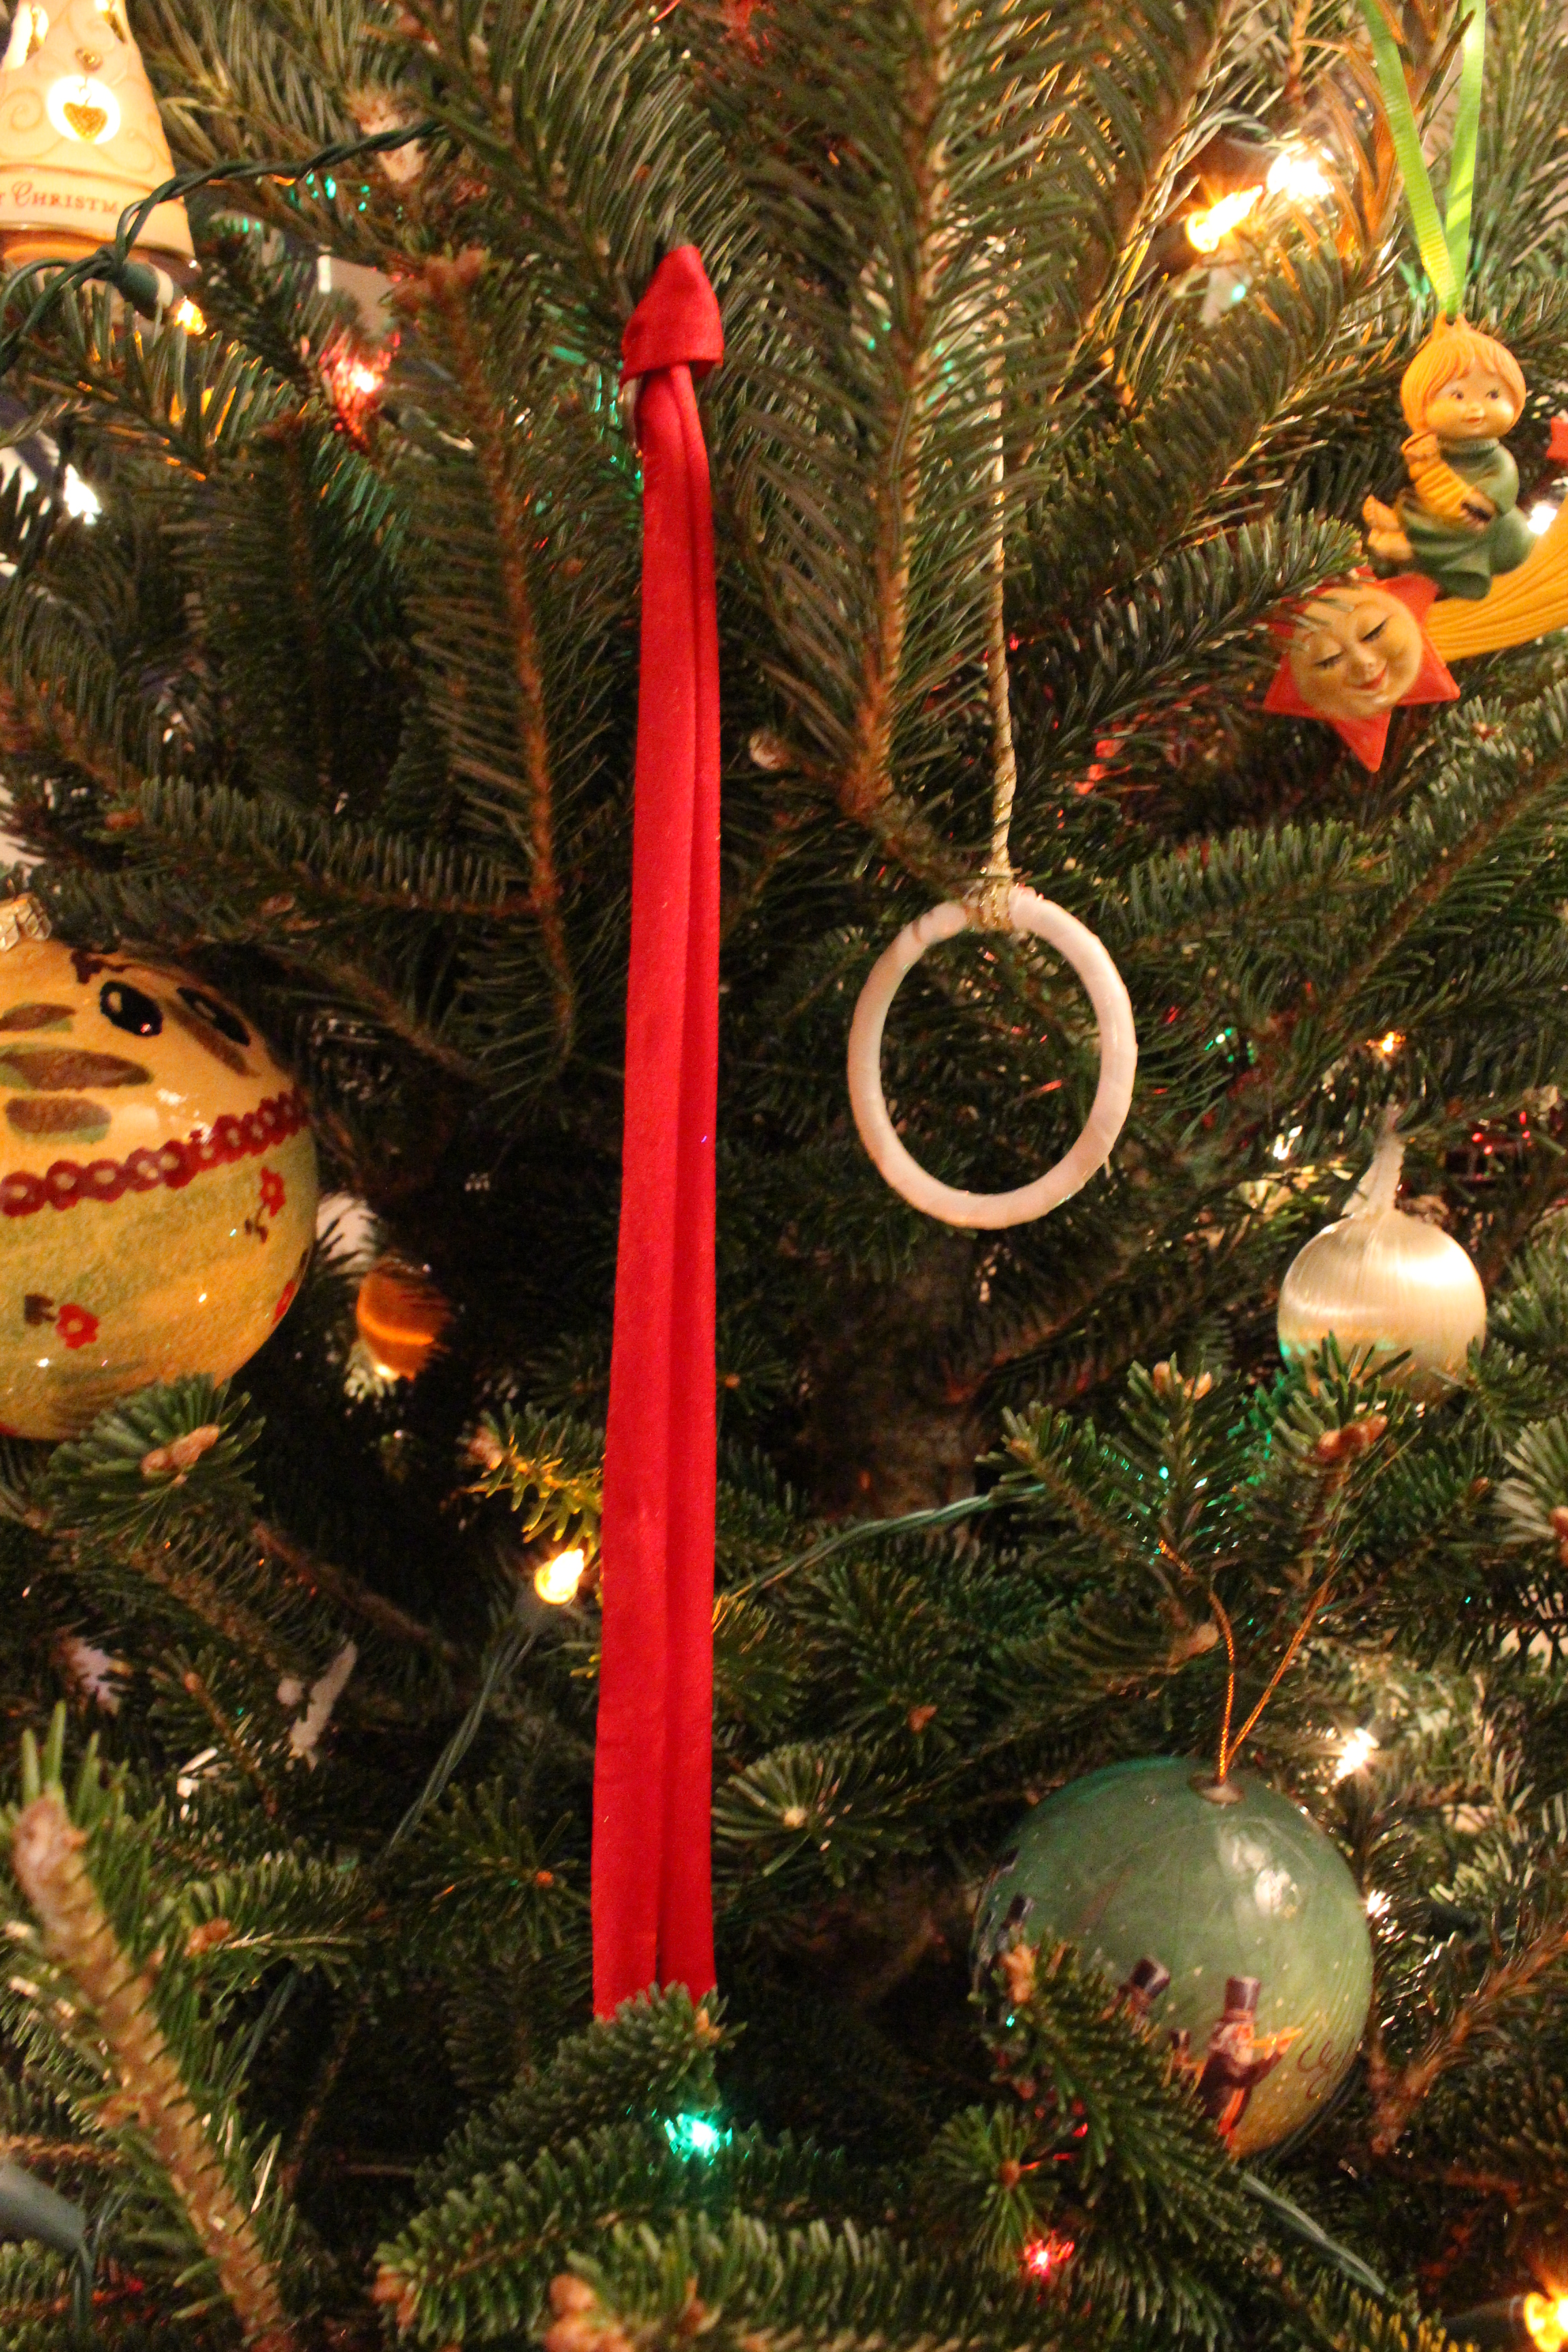
They are pretty simple to make. For an aerial silks ornament, use a thin slice of actual fabric material (perhaps some lying around from when you trimmed your fabric?). If you don’t have any spare fabric at home, then you can always go to your local craft store and buy some fabric that will work instead. For your “rigging,” attach your fabric directly onto an S hook or other tree ornament hook. Purchase a sturdy hook at your favorite hardware store or use a thin wire to loop the fabric on.
Make a Hoop Ornament
To make the aerial hoop ornament, your first task is to find a ring of some sort. You are likely to luck out at your local hardware store for a good little solid metal ring. Next, wrap it in your favorite color tape. Electrical tape works especially well because it’s generally already thin, but you can use any colored tape. I suggest cutting it down to about 1 cm across if you have thicker tape. This will help lessen the bumps and lumps as you tape. Then, use ribbon or wire for your “rigging.” Use gold lined wire ribbon to make it especially pretty. Twist it as you go up. Attach to an S hook or other tree ornament hook.
Make Your Own Apparatus!
Experiment with making a miniature trapeze or other favorite apparatus. These make great Christmas gifts for your students, teachers and/or other aerial friends. Or make them to put on your own tree to show off what you love!