All About That Lat, ‘Bout That Lat

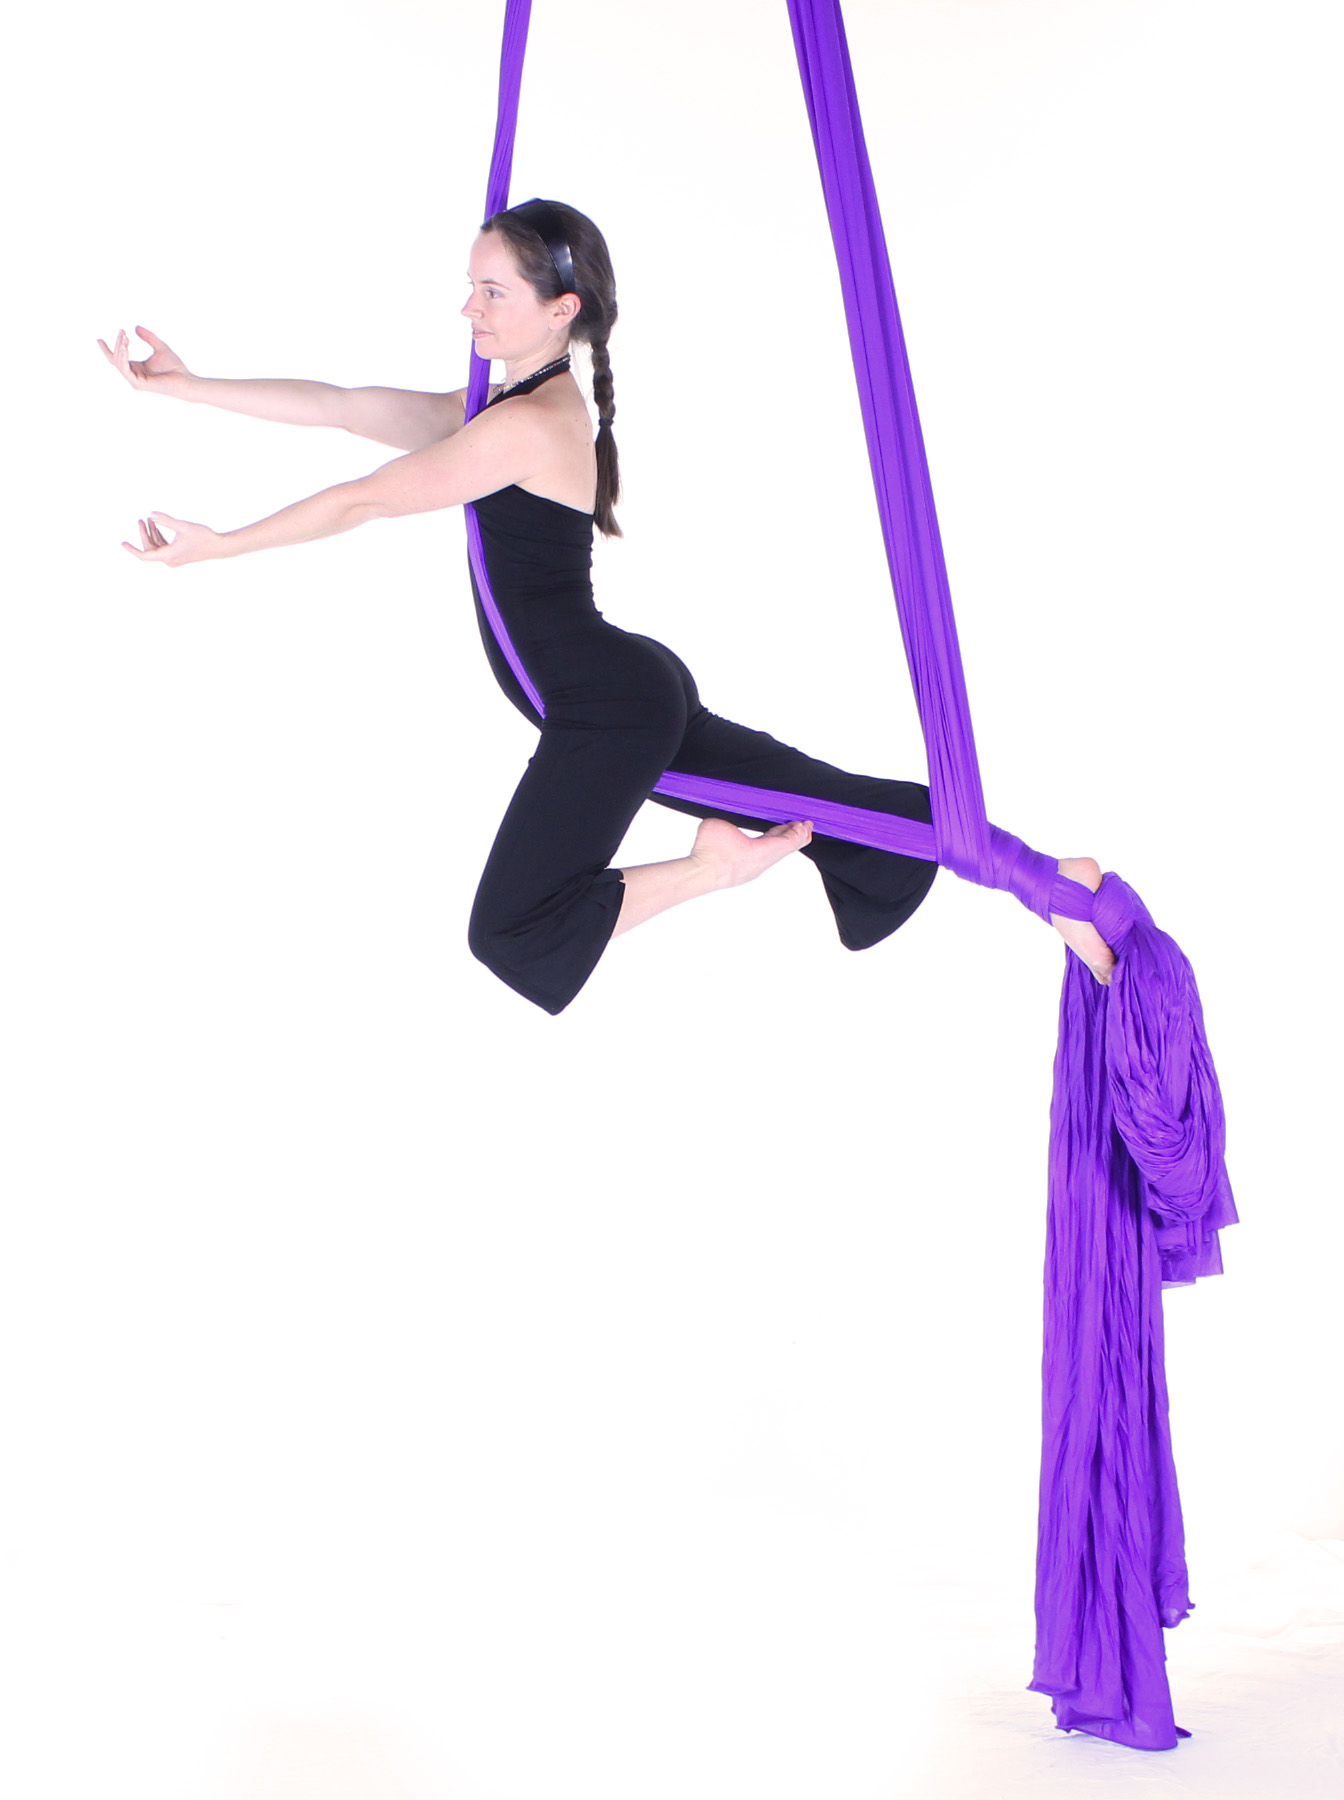
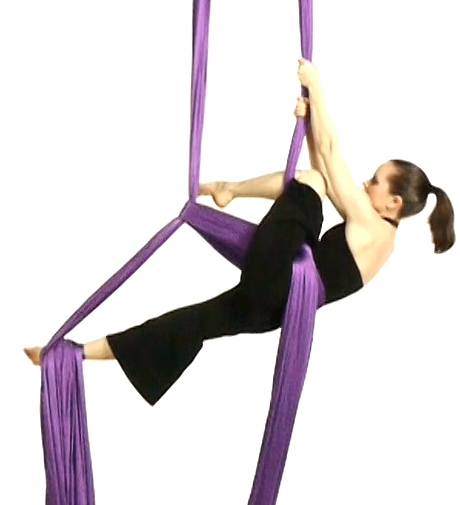
As aerialists, or just movement artists in general, it is important to take care of our body in order to insure longevity and safe practices. It is common in many other intense sports to burn out well before the age of 30. But in aerial, it is more common to start after 30! This is very unique in the world of movement and I strongly believe it is due to our focus on self preservation and longevity. Therefore, we should make sure to always include some sort of conditioning, flexibility, or cross training for the main joints and muscles that are used in aerial dance. A muscle that is of particular importance for aerialists is the latissimus dorsi, or commonly known as the lats. Dr. Jennifer Crane from Cirque Physio helps us to understand how to care for our lats in this blog post.

What are the Lats?

The lats are a huge muscle that affect many different regions of our bodies. Here are all of the different parts of the back and hips that the lats attach to:

  • Back of all the vertebrae- from mid back to our sacrum (T7-L5, and sacrum)
  • Lower part of shoulder blade (inferior angle of scapula)
  • Lower three or four ribs

From these attachment points, they course under your armpit and attach on the top part of your upper arm (intertubercular groove of the humerus). Yep…that’s a big muscle. Because our lats attach to so many different structures, they also influence way more than just the shoulder.

photo1 (1)

How Can we Measure the Flexibility of Our Lats?

An easy way to measure lat flexibility starts with: sitting with your back to the wall, scoot feet forward and flatten your entire back completely against the wall. Engage abs to keep ribs in. From here, raise one arm in front of you slowly as far as you can, with your palm facing up and your elbow straight. Use your other hand to monitor the point at which your back comes off the wall or the point at which your palm starts to turn inwards instead of staying u. Take a photo of this point. This is your functional lat muscle length.

While not all cases are the same, I recommend at least an angle of 180 degrees of active range of motion.  However, the best way to determine your specific needs and goals is to obviously see a sports medicine provider- there isn’t a one size fits all answer!

How Do We Improve Muscle Flexibility in General?

There are three main categories of flexibility, being: passive flexibility, active flexibility, and end-range control. The best way to go about increasing flexibility is by following this warm up/training regimine:

  • 10 minutes of cardio.
  • Soft tissue prep: spend some time using a foam roller, lacrosse ball, or peanut to address the muscle group that is about to be stretched.
  • Passive stretch. Whenever I do passive stretching, I always integrate a contract-relax component to the stretch.
  • Active flexibility. I like to take the muscle through a full range of motion into end range of motion, usually with resistance via a weight or a theraband.
  • End range control. With end range control exercises, I will typically start by only focusing on activating the antagonist muscles in the last 10-20 degrees of active range of motion of that joint.

What about Flexibility Exercises Pertaining to Lats?

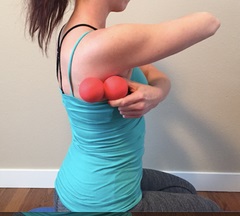
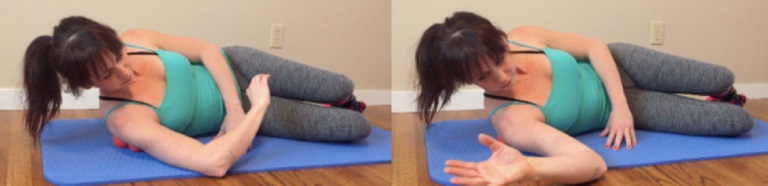
  • Peanut Mobilization: Lats

Start lying halfway between on your side and on your back, with the peanut placed as shown below. First, move from internal to external rotation with your shoulder just below 90 degrees. Then, move from bent arm to straight arm overhead. This often takes some peanut-adjustment to find the appropriate spot, so if you’re not feeling the “hurts so good” muscle release, move the peanut back a little or down a little. I suggest 10 repetitions per position, per arm, for the best effect.

photo2 (1)

photo3 (1)

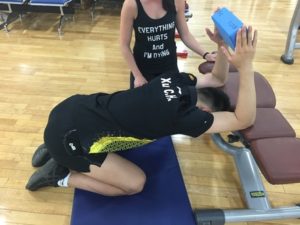
  • External Rotation-Biased Lat Stretch

Start in child’s pose with elbows shoulder width apart on the bench, and yoga block in hands. Let chest sink, hold 10-15 seconds. PNF contract-relax: gently push your elbows down into the bench while squeezing the ball/block. Hold for 8-10 seconds, then relax and stretch slightly further. Focus on keeping your ribs in during this whole stretch. If you let your ribs splay out, you’re allowing spinal extension, which is one of the most common compensations during lat stretching, and significantly decreases the effectiveness of this exercise. If you feel a pinching sensation in the front of your shoulders, back off the stretch and widen your elbows. If it persists, stop.

photo4 (1)


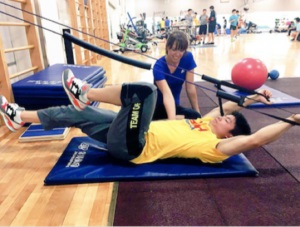
  • Modified Dead Bug for Active Shoulder Flexibility

Start with a theraband or tubing around stall bars (or similar). Hold the ends of the theraband with your thumbs pointing up. First, engage your abs and focus on keeping your ribs in for the whole exercise. Bring your arms overhead, while you simultaneously lower one leg. Bring your arms only as far overhead as you can while keeping your lower back flat on the floor. Return to the start position and switch legs. You absolutely must breathe during this exercise. If you hold your breath, you substitute by using your diaphragm instead of your abs for the core strength component. Keep your ribs in and your lower back flat on the mat the whole time. The second you start to arch your back, it is no longer an active lat stretch.

photo5 (1)

  • Child’s Pose Shoulder Elevation for End-Range Control

Start in child’s pose with your thumbs up. With one arm, first engage shoulder elevators by shrugging your shoulder up slightly. From here, lift your arm up as far off the floor as you can. It may not be very far, but that’s okay! Focus on engaging the muscles around your shoulder blade to start to maintain end range position. Hold this end range position for 5-10 seconds, then switch. This should also be done 2-3 times to fatigue.

photo6 (1)

A big thanks to Jenn Crane for providing all of the material for this blog post! Dr. Jennifer Crane is a physical therapist, athletic trainer, board certified orthopedic specialist, and published author. She has been a sports medicine professional for eleven years, and has worked with a wide variety of athletes and performing artists throughout that time. In 2015, she worked as a physiotherapist living in China with the Chinese Olympic Teams in preparation for the Rio 2016 Olympics. Now, in addition to maintaining her practice in California, she works on a contractual basis with Cirque Du Soleil, as a physiotherapist in their performance medicine department. You can visit her website here – cirquephysio.com. I would highly recommend checking out her MyFLEX program if you’re looking to improve your flexibility!


Aerial Taxonomy Explained

Here it is — the blog you’ve been waiting for. The one where I reveal all my secrets. Before I do, a little backstory to give motivation:

When I used to tutor math, I would start by giving a speech at the beginning of my tutoring session, “I am so good that I am bad for my own business. My job is to work myself out of a job by giving you all the tools you need to do this on your own. You don’t need me and I’m going to show you. You can do this on your own and if I am successful, I will be out of a job here and on my way. That’s the goal.”

Teaching is about letting the student become the master. In my case, I feel that if I can just get students to *think* a certain way about aerial, then the whole world will open where they will no longer desire classes to teach just skills. They will hunger after classes as a means of communal research, training, fun and exploration, and not at all about teaching trick, trick, trick, trick. Aerial is about something much more fun and exciting — it’s about creating and exploring! And this is why I teach using the methods of aerial taxonomy. The “tricks* I teach are the classics, the basics, the standards. The fun part is the layering, the discovering of the millions of ways to manipulate and weave in between the classics. It’s not fun to go steal how someone on Instagram weaved and twisted and turned. It may be inspiring to see that things can be done a different way, but it could also be done YOUR way if you took the time to research. There are enough variations for us ALL to have our own unique pathways, threads and weaves in and around our apparatuses. Stop being someone else. That’s what this is about. Let’s start teaching the TOOLS to create and each be pioneers of the art form.

The following is from a workshop I give called “Aerial Taxonomy 101,” but I’ve recently started incorporating the language into everything I do. You will start to see classifications of this sort in each of my upcoming books, starting with the Aerial Sling Manual Volume 2, which will be out by the end of 2019. These are all important terms to know and understand in the science of classifying aerial skills.

Aerial Taxonomy Terms

SKILLS

If we are drawing the analogy to the animal kingdom, then skills are your animals. Our job in aerial taxonomy is to classify and put each skill into categories, drawing out the underlying similarities between apparatuses, etc.

Each skill can be defined by four elements: (1) the underlying base position(s) you are in, (2) what actions got you into your skill, (3) what shape you are in and (4) what apparatus you are on.

For example, the following skill can be classified as:

leg rollup 10


apparatus: fabric

base position: footlock

action: roll-up

shape: bowsprit lean

BASE POSITIONS

Base positions are the skills which grow other skills. The branches from which the leaves emerge.

Base positions can vary from studio to studio, but the overlapping Venn diagram would include skills that everyone can agree are “must-knows” on each apparatus. For example, a footlock on silks is a classic base position, as is catcher’s (aka open thigh wrap), s-wrap, hip key, etc. These are skills that everyone can agree on that every aerial fabric student should know. Each are independent of one another and help build the rest of the vocabulary.

Skills such as crossback straddle would not necessarily be considered a base position for the sake of aerial taxonomy, but rather a combination of base positions. Crossback straddle is a combination of the base position of crossback and footlocks.

ROOT POSITIONS

These are a subset of base positions. I won’t go into this in detail here, but root positions are helpful when you are trying to boil down all base positions into as few elements as possible. Root positions can be thought of as the tree trunk which grows the base positions, which are the branches; which grow the leaves, which are the skills. More on this in my workshop.

SHAPES

Shapes help describe the orientation of the body while in a particular skill. For example, I could be inverted under a hoop (a base position) and make a wide variety of shapes. I could be in a meathook, a straddle, a pike, a ball, the splits, etc. None of these really affect my location in terms of my contact with the apparatus, but they can affect my tilt, orientation, and general look of the skill.

Some examples of some well-recognized shapes:

Amazon
Angel
Arabesque
Arch Back (Global Extension)
Arm Straddle (aka Nutcracker)
Armbreaker
Arrow
Back Balance
Back Planche
Back Planche Split
Bird’s Nest
Butterfly
Candlestick
Chair
Crucifix
Cuddle (sleeper)
Cupid (Press-Out)
Flag
Frog
Front Balance
Gazelle
L-sit
Lay Out
Leanna
Lotus
Lion
Man in the Moon (Profile Sit)
Martini
Meathook
Mermaid
Neck Hang
Pancake
Pike
Planche
Plank (Straight-body of various directions)
Popsicle
Scissor Legs
Scorpion
Shoehorn
Splits
Spear
Stag
Star
Straddle
Toe Star
Tuck (aka ball)
Vareki (aka arched arrow)

ACTION CLASSES

Actions are the transitions of aerial. They tell us how we got from the trunk to the branch to the leaf. Did we walk, run, skip or crawl? I have placed these in “classes” in order to study them more in-depth as categories.

For example, my favorite action class is knee hooks. On any vertical apparatus, you typically have six classic knee hook options: (1) same-side regular, (2) opposite-side regular, (3) inside reverse knee hook, (4) outside reverse knee hook, (5) inside 2-knee hook, and (6) outside 2-knee hook.

It is a very interesting study to take this list and apply it on top of each base apparatus in term. For example, try each of these 6 knee hooks atop a hip key. What do you get? (In one of my workshops, we go through all these examples, and find some fun connections!)

Some other examples of actions of aerial:

push-out
invert
arch
lean out
tilt
pike (crease/fold)
tuck
sink (trash can)
heel hook
flex foot (ankle) hook
knee hook (reverse, inside, outside, 1 or 2 knee)
leg thread
knee thread
arm thread
(note: arm and knee threading are all a part of the threading class)
spin
hula
balance
key over
flamenco grip (part of the grip-options class)
angel roll
hip block
shoulder block
roll (roll up, down, sideways, etc)
turn
stuff-it (soft bar only)
climb
slide
wedge (press-support)
beat
grab overhand
grab underhand
crochet
sickle block (golf club foot press)
skin the cat
toe grab

APPARATUS

This category is pretty straight-forward. However, I do want to note that often times, I will use terms like “We are in silks-land now” even though we are working on a sling. For example, if you climb up high enough and put on footlocks above you, you are really in “sling-land” anymore. That’s a fabric skill that is being placed on sling. So, sometimes the apparatus where the base position is rooted is different than the apparatus where the skill is being applied.

Let it be understood, that even though I don’t study footlocks as a base position in sling, I am never opposed to using them there. That is part of the fun, the exploration and the creativity. It’s one thing to classify the classics. It’s another to start breaking all the rules. 🙂

In Summary…

My aerial taxonomy goes more in-depth than this introduction here, but I hope that this gives you a good overview for understanding my categories of study. Like I mentioned above, you can expect to see these classifications come more to the fore-front of coming manuals as I work to create a universal language and curriculum for the aerial arts. I hope to maintain great consistency across all the aerial apparatuses, and provide the study of each apparatus that highlights the unique properties of each, allowing you to cross-train and break all the rules as you may.


Why You Should Care -> Aerial Taxonomy

I’ve been on an “Aerial Theory” kick lately and so you are getting some of my thoughts through this current blog series. In my last blog, I coined a term = Aerial Taxonomy. Just like biologists are concerned with classifying animals into kingdom, order, phylum, etc, it’s time aerialists got more organized with their classification system for aerial skill sets.  This blog is concerned with why you should care. My next blog will be concerned with a set of guidelines that I follow when setting scientific-aerial names.

Aerial Taxonomy = The branch of science concerned with classification of aerial moves.

1. Having clear aerial taxonomy helps to classify aerial skills.

Well, this is the definition. Yes.

2. It helps to speak a similar language within the community.

I really appreciate being a part of the “creating a common language for aerial arts” Facebook group. It helps to see what people are calling things from different parts of the country. (I can’t imagine what it’s like in other languages — if anyone knows, you’ll have to let me know.)

If we can hit the more descriptive names when we cross-reference and cross-train, this can help us communicate more effectively across the professional aerial industry. When students move and pick up training at another gym, it is helpful to have similar names from place to place, at minimum for the basics of aerial.

3. It helps to raise the professional aerial community to higher standards.

When teachers get together and talk teacher-talk, it is extremely helpful to have proper names rather than say “I teach the purple bomb, then the sparkling twirl, etc.” Even if your local vernacular differs from the scientific name, anyone who seeks to be a professional aerial educator should learn the scientific names to be able to communicate among other professionals. This is analogous to calling a cat a “cat” versus “felis catus.” There’s a time and a place for both.

4. It helps to understand the connections between moves.

The more that you can abstract the concept behind the skill, the more you are able to see how skills across the board relate with one another, both in technique and through transitional pathways. You can then use conceptual connections when exploring unfamiliar territory and you can use transitional connections to enter and exit skills in interesting and unique ways for choreography.

If you have studied rope or silks for any length of time, you are starting to see how vital hitches are to your understanding of wraps. They pop up everywhere and do so many things! It’s helpful to have a consistent naming system for all these hitches (more next blog).

To give another example of this-> I have a skill on sling that I have named the “hip corset.” It is where the sling crosses behind your back and tightens around your hips. This very same wrap can also be put on the thigh. In that case, I am using the term “knee corset.” By using the term “corset” in both places, I am helping to highlight the similarities between the wraps. This can help students to see the underlying concepts as well. I will be writing more on this in the next blog.

5. It helps you to read new moves faster.

When I watch moves that go around on social media, or — most useful of all —  when I’m watching my students during their learning process, I can immediately tell what they are doing and why things are working the way the are (or not working the way they are supposed to).

6.  It helps you to uncover and discover uncharted territory.

This is the number one reason I am an Aerial Taxonomist/Researcher/Aerial Scientist & Classifier —> It gives you a systematic way to organize skills and thus you can find ones that are hiding just beneath the surface but no one has found yet! This is my favorite part. Even if they are things that have been done, seeing a new way to do an old thing or see a connection to another puzzle piece is fascinating.

I’ve included a video below so that you can see my brain in action. In this video, I go from a pedal press arabesque into an arabesque with silks together into a hip-blocked skater, into half-catchers and finally into catcher’s. It’s all in the family of half-catcher’s. By seeing that the wrap on the leg was a “catcher’s-crossing” I could see the transition was possible. The theory lies in the language that we use. I will write more on this topic in my next blog. Thanks for reading. 🙂

PS: Remember, if you like this kind of thing, we have almost 1,000 videos now in our video library that spans sling, silks, trapeze, hoop and rope!!! Sign up for a paying membership to view the whole library!!